
Is your RV water heater pressure relief valve leaking? This common issue can cause concern.
An RV water heater pressure relief valve is essential for safety. It helps prevent excess pressure from building up in the tank. But, leaks can lead to water damage and inefficient heating. Identifying the cause of the leak is crucial.
It could be due to wear and tear, incorrect pressure settings, or even debris. Understanding why your valve leaks can save you from costly repairs. In this blog post, we’ll explore common causes and solutions for a leaking RV water heater pressure relief valve. By the end, you’ll know how to fix the issue and maintain your RV’s water heater.
Identifying The Issue
Spotting a leak in your RV water heater pressure relief valve is essential. Leaks can lead to water damage and other issues. Identifying the problem early can save you time and money.
Common Symptoms
Several symptoms can indicate a leaking pressure relief valve. You might see water dripping or pooling around the valve. Another sign is a constant hissing sound. These signs mean that there is a problem with the valve.
Potential Causes
There are various reasons why the valve might leak. One common cause is a faulty valve. Over time, the valve can wear out and fail. Another cause is excessive pressure in the water heater. This can force the valve to release water. Sediment build-up inside the tank can also lead to leaks. Regular maintenance can help prevent these issues.

Credit: structuretech.com
Tools And Materials Needed
Addressing a leaking RV water heater pressure relief valve is essential. The right tools and materials ensure a smooth and efficient repair process. Below is a detailed list of what you need to get started.
Essential Tools
- Adjustable Wrench: For loosening and tightening the valve.
- Pliers: Useful for gripping and holding parts.
- Bucket: To catch any water spillage.
- Teflon Tape: Ensures a tight seal when installing the new valve.
- Safety Glasses: Protects your eyes from any splashes.
- Gloves: Protects your hands during the repair.
Required Materials
| Material | Purpose |
|---|---|
| New Pressure Relief Valve | Replaces the old, leaking valve. |
| Sealant | Helps create a watertight seal. |
| Cleaning Cloth | Wipes away any dirt or debris. |
Having the right tools and materials on hand is crucial. It makes the repair process smoother and more efficient. Ensure you have everything ready before starting the task.
Safety Precautions
Ensuring your RV water heater pressure relief valve is safe is crucial. Taking the right safety precautions can help prevent accidents and injuries. Follow these steps to safely handle a leaking valve.
Turning Off Power
Begin by turning off the power to your water heater. If your water heater is electric, switch off the breaker. If it’s gas-powered, turn off the gas supply. This step prevents electrical shocks and other hazards. Always ensure the power source is completely off before proceeding.
Draining The Water Heater
Next, drain the water heater to reduce pressure. Attach a hose to the drain valve at the bottom of the heater. Direct the hose to a safe drainage area. Open the drain valve slowly to let the water flow out. Be cautious of hot water that may cause burns.
After draining, close the drain valve securely. This step helps to inspect the pressure relief valve safely. Never skip draining as it reduces the risk of injury. Follow these safety measures to handle your RV water heater effectively.
Locating The Pressure Relief Valve
Easily locate the RV water heater pressure relief valve on the top or side of the heater. Identifying this valve helps address leaking issues quickly.
Finding the pressure relief valve on your RV water heater is crucial. Knowing its location helps you address leaks promptly. This section will guide you step-by-step.
Valve Position
The pressure relief valve is often found on the top or side of the water heater. It is a small, brass valve with a lever. The valve usually has a discharge pipe attached to it.
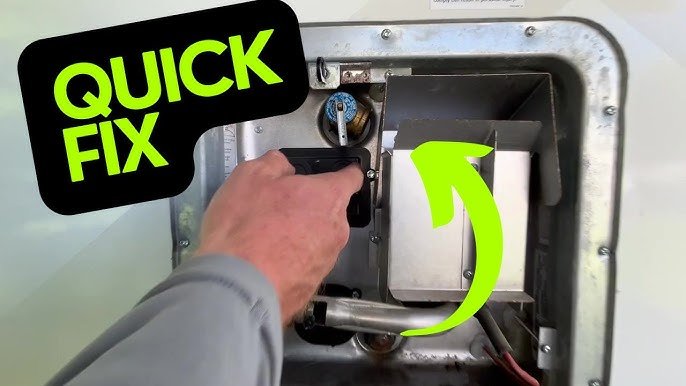
Accessing The Valve
First, turn off the water heater. Ensure the unit is cool to avoid burns. Next, open the access panel. You will find the panel near the water heater. Carefully remove any screws holding the panel in place. Once the panel is off, the valve should be visible. Check for any signs of leaks or damage. If the valve is leaking, it may need replacement. Always consult your RV manual for specific instructions. “`
Inspecting The Valve
The pressure relief valve on your RV water heater is crucial. It prevents excessive pressure build-up. If it’s leaking, inspecting the valve is the first step to fix the issue. This inspection helps identify the cause of the leak, ensuring safe and efficient operation of your water heater.
Visual Inspection
Start by performing a visual inspection of the valve. Look for any obvious signs of damage. Check for cracks or corrosion around the valve body. If you see any damage, the valve might need replacing. Ensure the valve is securely attached to the water heater. A loose valve can cause leaks.
Checking For Debris
Next, check for debris inside the valve. Debris can cause the valve to malfunction. Turn off the water heater and let it cool. Open the valve to release any trapped pressure. Look inside for any foreign particles or buildup. Use a small brush to clean out any debris. This simple step can often resolve minor leaks.
Replacing The Valve
Replacing a leaking RV water heater pressure relief valve can seem daunting. Yet, with the right steps, you can do it yourself. This guide will walk you through the process.
Removing The Old Valve
First, gather your tools. You will need a wrench, Teflon tape, and a new valve. Before starting, make sure the water heater is off and the water has cooled down.
Next, turn off the water supply to the heater. Open the nearest hot water faucet. This will relieve any remaining pressure. Use your wrench to loosen the old valve. Turn it counterclockwise until it comes off. Be careful, as there may still be some water inside.
Installing The New Valve
Take your new valve and wrap Teflon tape around its threads. This helps create a tight seal. Screw the new valve into the heater’s opening. Turn it clockwise with your hand until it’s tight. Use your wrench to give it an extra turn, ensuring it is secure.
Turn the water supply back on. Check for any leaks around the new valve. If there are no leaks, you have successfully replaced the valve. Now, turn the heater back on and allow it to heat the water. Check the valve again to ensure everything is working correctly.
Replacing the valve is a simple process. With these steps, you can handle a leaking RV water heater pressure relief valve with ease.
Testing The New Valve
After replacing the faulty valve, it’s crucial to test the new one. This ensures it works correctly and prevents any future leaks. Testing the new valve involves a few simple steps. You can do it all by yourself.
Refilling The Water Heater
First, you need to refill the water heater. Close the pressure relief valve. Then, turn on the cold water supply. Let the tank fill up. Check if the tank is full by opening a hot water tap. Water should flow steadily from it.
Checking For Leaks
Next, inspect the new valve for any leaks. Observe the valve closely. Look for any water drips around it. If you see any, the valve might be faulty. Tighten the valve if needed. If leaks persist, consider replacing the valve again.
Preventive Maintenance Tips
Ensure your RV water heater pressure relief valve isn’t leaking by regularly checking for debris. Clean the valve to prevent blockages and ensure proper function. Regular maintenance can save you from potential water damage.
A leaking RV water heater pressure relief valve can cause many issues. Preventive maintenance is key to avoiding these problems. Regular care will keep your water heater working well.
Regular Inspections
Check your RV water heater pressure relief valve often. Look for any signs of leaks or rust. Make sure the valve opens and closes properly. This simple step can prevent bigger problems later. Inspect the area around the valve. Look for any water stains or drips. These could be signs of a leak. Catching these early can save you from costly repairs.
Proper Usage
Do not overfill your water heater. Leave some space for the water to expand. Overfilling can put extra pressure on the valve. This can cause it to leak. Use your water heater properly. Follow the manufacturer’s guidelines. Avoid setting the temperature too high. High temperatures can increase pressure and lead to leaks. By following these tips, you can keep your RV water heater pressure relief valve in good shape. Regular inspections and proper usage can help you avoid leaks and other issues.

Credit: www.youtube.com
Frequently Asked Questions
Why Is My Rv Water Heater Leaking?
A leaking RV water heater could be due to high pressure, a faulty valve, or old age.
How To Fix A Leaking Pressure Relief Valve?
To fix a leaking pressure relief valve, try replacing it or checking for high water pressure.
Can I Use My Rv With A Leaking Water Heater?
Using an RV with a leaking water heater is not recommended. It can cause further damage.
How Often Should I Replace The Pressure Relief Valve?
Replace the pressure relief valve every 2-3 years to ensure proper functioning and safety.
Conclusion
Fixing a leaking RV water heater pressure relief valve is essential. Ignoring it can cause more damage. Regular maintenance prevents future leaks. Check the valve often for signs of wear. Replace if needed. It ensures a safe and comfortable trip.
Understanding your RV system saves time and money. Happy travels!


