
Replacing the fresh water fill hose in an RV is essential for maintaining clean water. A damaged hose can lead to leaks and contamination, risking your water supply.
Living the RV life is full of adventures and new experiences. But maintaining your RV is crucial for a smooth journey. One important task is replacing the fresh water fill hose. Over time, these hoses can wear out, leading to leaks or water contamination.
Replacing it ensures that your water stays clean and safe. Whether you’re a seasoned RV owner or a beginner, understanding how to replace this hose can save you trouble down the road. In this post, we’ll guide you through the process, making it easy and stress-free. Let’s keep your RV’s water system in top shape!
Tools And Materials Needed
Replacing an RV fresh water fill hose can seem daunting. But with the right tools and materials, the task becomes manageable. This section will guide you through the essential tools and required materials needed for a smooth replacement process.
Essential Tools
Having the right tools is crucial. Here are the essential tools you will need:
- Screwdriver: A flathead or Phillips screwdriver helps in loosening and tightening screws.
- Pliers: Use pliers for holding and bending objects.
- Utility Knife: A sharp utility knife is essential for cutting the hose to the desired length.
- Measuring Tape: Use a measuring tape to ensure accurate length of the hose.
- Wrench: A wrench helps in tightening hose clamps securely.
Required Materials
Gathering the right materials beforehand will streamline the replacement process. Here are the materials you need:
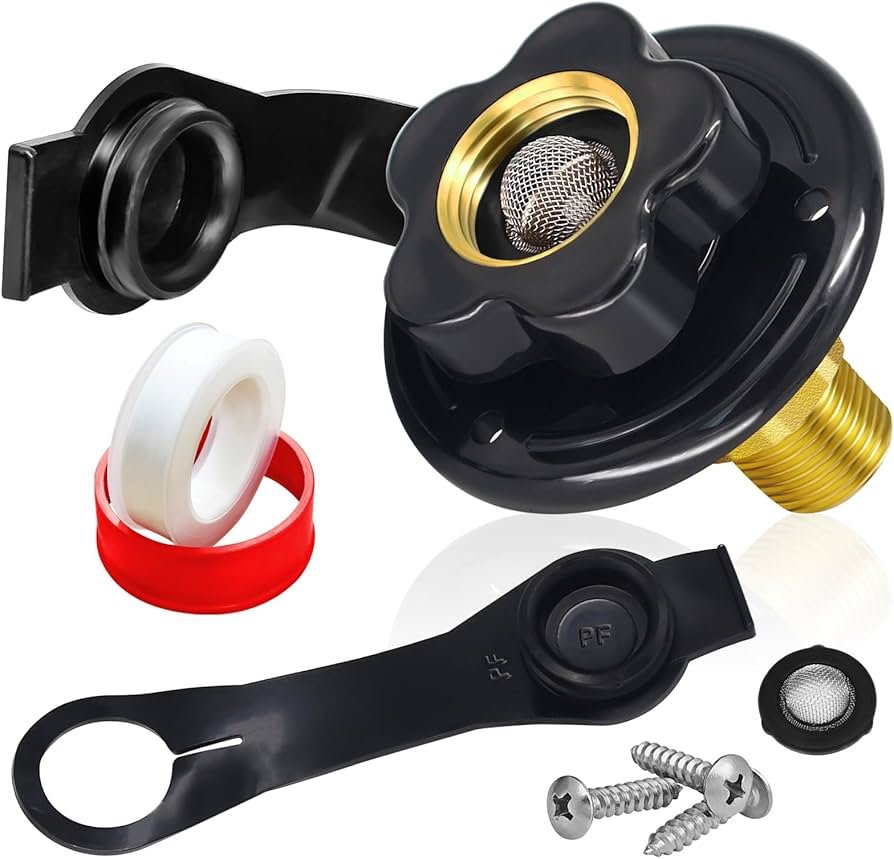
- New Fresh Water Fill Hose: Ensure you have a high-quality hose that fits your RV’s specifications.
- Hose Clamps: Hose clamps are necessary to secure the hose in place.
- Teflon Tape: Use Teflon tape to seal any threaded connections.
- Cleaning Cloth: A clean cloth helps in wiping down fittings and connections.
- Bucket: Keep a bucket handy to catch any excess water during the replacement.
Preparation Steps
Replacing your RV fresh water fill hose may seem daunting. But with proper preparation, the task becomes straightforward. This section will guide you through the essential steps to prepare for the replacement. Follow these steps to ensure a smooth and safe process.
Safety Precautions
Start by turning off the water supply. This prevents any water leaks. Disconnect the RV from any external power sources. Safety first. Use gloves to protect your hands. Have safety glasses on to shield your eyes. Safety measures reduce the risk of injury during the replacement.
Workspace Setup
Choose a clean, dry area to work. Ensure the space is well-lit. This helps you see clearly and avoid mistakes. Gather all necessary tools and materials beforehand. You will need a new hose, wrench, screwdriver, and a bucket. Keep a towel nearby to wipe any spills. Organization speeds up the process and reduces frustration.
Locating The Fresh Water Fill Hose
Locating the fresh water fill hose in your RV might seem tricky at first. Proper location ensures that your water system functions efficiently. Knowing where to find this hose can save time and avoid frustration. Let’s break down the steps to locate your RV’s fresh water fill hose.
Rv Manual Reference
Start by consulting your RV’s manual. The manual provides specific details about your model. Each RV brand and model can have slight variations. The manual often includes diagrams that highlight the location of the fresh water fill hose. This is the most reliable source for accurate information.
Identifying Hose Location
Once you have the manual, look for the water system section. The fill hose is usually near the fresh water tank. It can often be accessed from an external panel on the side of the RV. Look for a labeled panel such as “Fresh Water Fill” or a similar term.
If the manual is not available, you can also trace the hose from the water tank. The hose should lead to an external fill point. Check for a small door or hatch on the RV’s exterior. This is typically where the fill hose is connected.
Removing The Old Hose
Replacing your RV’s fresh water fill hose keeps your water system clean. The first step is to remove the old hose. This task might seem tough, but it’s simple if you follow the steps carefully.
Disconnecting The Hose
First, locate the connection where the hose meets the water tank. Turn off the water supply. Then, unscrew the hose from the tank fitting. You might need pliers for a tight connection. Be careful to avoid damaging the fitting.
Removing Clamps And Fittings
Next, look for clamps holding the hose in place. These are often near the tank and along the hose length. Use a screwdriver to loosen and remove these clamps. Keep the clamps and screws in a safe place. You might need them later.
After removing the clamps, check for any fittings attached to the hose. Carefully unscrew or slide off these fittings. With the hose free from clamps and fittings, you can now remove it completely. Dispose of the old hose properly.
Installing The New Hose
Replacing your RV’s fresh water fill hose is crucial for clean water supply. This guide helps you install the new hose step by step. Let’s dive in.
Attaching The Hose
First, align the new hose with the water inlet. Make sure the hose fits snugly. A loose fit can cause leaks.
Next, push the hose into place until it reaches the inlet’s end. You might need to twist it gently. This ensures a secure connection.
Securing Clamps And Fittings
Now, it’s time to attach the clamps. Place a clamp over the hose where it meets the inlet. Tighten it using a screwdriver. This prevents the hose from slipping off.
Then, check for any fittings that need securing. Some hoses come with additional fittings. Follow the manufacturer’s instructions for these. Tightening all connections is key to preventing leaks.
Finally, turn on the water supply to test the new hose. Look for any leaks. If there are none, your installation is successful.

Credit: www.youtube.com
Testing The New Hose
After installing the new RV fresh water fill hose, it is crucial to test it. This ensures that everything is working correctly. Follow these steps to ensure the hose is functioning as expected.
Checking For Leaks
First, turn on the water supply slowly. Watch the hose closely. Look for any signs of leaks. If you see water dripping, tighten the connections. Continue to monitor the hose for a few minutes. Ensure there are no drips or wet spots. Leaks can lead to water damage and other issues.
Ensuring Proper Water Flow
Next, check the water flow. Turn the faucet on to full. Observe the flow of water. It should be steady and strong. If the flow seems weak, there might be a blockage. Check the hose for any bends or kinks. Smooth them out to restore proper flow.
If the water flow is still not right, you might need to clean the hose. Sometimes debris can get stuck inside. Use a hose cleaning brush to clear out any obstructions. Run water through the hose again. Ensure the flow is now strong and steady.
Maintenance Tips
Proper maintenance of your RV’s fresh water fill hose ensures a safe and enjoyable travel experience. Neglecting this can lead to water contamination and hose damage. Follow these simple tips to keep your hose in top condition.
Regular Inspections
Inspect your hose before each trip. Look for cracks, leaks, and wear. A damaged hose can cause water contamination. Replace any hose that shows signs of wear. Check the connections for tightness. Loose connections can lead to leaks.
Cleaning The Hose
Clean the hose regularly. Use mild soap and water. Avoid harsh chemicals. They can damage the hose. Rinse thoroughly after washing. Any soap residue can affect the water taste. Dry the hose completely before storage. A dry hose prevents mold and mildew growth.
Troubleshooting Common Issues
Replacing the fresh water fill hose in your RV can be a daunting task. Sometimes, things don’t go as smoothly as planned. Here, we will discuss common issues and how to troubleshoot them effectively. Understanding these problems can save you time and frustration.
Leak Problems
Leaks are a common issue with RV water hoses. They can occur at various points. First, inspect the connection points. Ensure the hose is tightly connected. Sometimes, a loose connection causes the leak.
If the leak persists, check the hose for damage. Small holes or cracks can lead to leaks. Use a flashlight to spot any issues. If you find damage, replace the hose immediately. A damaged hose can cause significant water loss.
Common Leak Sources:
- Loose connections
- Damaged hose
- Worn-out washers
Water Flow Issues
Another common problem is poor water flow. This can be frustrating. First, check the water pressure. Low pressure can affect the flow. Ensure the water source has adequate pressure.
If the pressure is fine, inspect the hose for kinks or bends. These can restrict water flow. Straighten the hose and see if it improves. Also, check for blockages. Debris inside the hose can cause flow issues. Flush the hose to clear any blockages.
Common Water Flow Issues:
- Low water pressure
- Kinks or bends in the hose
- Blockages inside the hose
Addressing these issues promptly ensures a smooth water supply to your RV. Regular maintenance and inspections can prevent many of these problems.

Credit: www.ebay.com
Frequently Asked Questions
How Do I Replace An Rv Fresh Water Fill Hose?
To replace an RV fresh water fill hose, first, turn off the water supply. Then, remove the old hose and attach the new one securely. Make sure all connections are tight to prevent leaks.
What Tools Are Needed For Hose Replacement?
You will need a wrench, screwdriver, and possibly pliers for hose replacement. These tools will help you remove and secure the hose connections effectively.
How Often Should I Replace The Water Fill Hose?
Replace your RV water fill hose every 3-5 years or if it shows signs of wear. Regular inspection ensures a safe and efficient water system.
Can I Use Any Hose For Rv Water Fill?
No, always use a hose specifically designed for potable water. These hoses are safe for drinking water and prevent contamination.
Conclusion
Replacing your RV fresh water fill hose is simple and important. A new hose ensures clean water and prevents leaks. Regular checks help maintain your RV’s plumbing system. It keeps your trips worry-free. Follow the steps mentioned for an easy replacement.
Always use quality parts for better performance. Your RV deserves the best care. Enjoy your travels with peace of mind.


