

Installing a 50 Amp RV outlet at home can be a smart move. It offers convenience and can be a great addition for RV owners.
But what does it cost? Many RV owners find themselves needing a reliable power source at home. Adding a 50 Amp RV outlet can provide this convenience. It allows you to charge your RV without hassle. But before you get started, it’s important to understand the costs involved.
The expense can vary based on several factors. These include the distance from the main electrical panel, the cost of materials, and labor fees. Knowing these details can help you budget effectively. In this blog post, we will break down the costs and considerations. This will help you make an informed decision. Let’s dive in and explore what you need to know.
Preparation
Before diving into the installation of a 50 Amp RV outlet at home, proper preparation is crucial. This ensures a smooth and safe installation process. This section will cover the necessary tools and materials, and important safety precautions.
Tools And Materials Needed
To install a 50 Amp RV outlet, gather the following tools and materials:
- Screwdriver
- Wire stripper
- Voltmeter
- Drill
- Level
- Fish tape
- Electrical conduit
- 50 Amp RV outlet
- 50 Amp circuit breaker
- Heavy-duty electrical wire
Having everything ready saves time and keeps the project organized.
Safety Precautions
Safety is the top priority when working with electricity. Follow these precautions:
- Turn off the main power supply before starting.
- Use insulated tools to avoid electric shocks.
- Wear safety goggles and gloves.
- Double-check connections with a voltmeter.
- Follow local electrical codes and regulations.
These steps help prevent accidents and ensure a safe installation.

Credit: www.youtube.com
Choosing The Location
Choosing the right location for your 50 Amp RV outlet is crucial. It ensures safety, convenience, and efficiency. You need to consider various factors to make the best choice.
Proximity To Rv Parking
The outlet should be close to where you park your RV. This reduces the length of the power cord. A shorter cord minimizes the risk of tripping and power loss. Measure the distance from your RV parking spot to the desired outlet location. Make sure it is within a safe and convenient range.
Accessibility To Power Source
Your outlet must be near an existing power source. This could be your main electrical panel or a sub-panel. Placing it near a power source reduces installation costs. It also simplifies the wiring process. Check the electrical layout of your home before deciding on the location. Consult with a qualified electrician if you are unsure.
Gathering Permits
Installing a 50 Amp RV outlet at home involves several steps. One of the most important steps is gathering permits. This ensures that your installation meets local safety codes and regulations. Proper permits also prevent potential legal issues in the future.
Local Regulations
Before starting the installation, check your local regulations. Different areas have different rules for electrical work. Visit your city or county’s website to find the specific requirements for your location. You can also contact your local building department for guidance.
In many places, a licensed electrician must perform the installation. This is to ensure that the work meets safety standards. Ignoring these regulations can lead to fines or required rework.
Application Process
Once you know the local regulations, begin the application process for the permit. This typically involves filling out a form with details about your project. You may need to provide information about the electrical work planned and the licensed electrician you will use.
Submit the application to your local building department. They may require you to pay a fee. The fee varies based on your location and the complexity of the project.
After submitting your application, wait for approval. The approval process can take a few days or weeks. Once approved, you can proceed with the installation.
| Step | Description |
|---|---|
| Step 1 | Check local regulations |
| Step 2 | Contact the local building department |
| Step 3 | Fill out the permit application form |
| Step 4 | Submit the application and pay the fee |
| Step 5 | Wait for permit approval |
Gathering permits is a crucial step for a safe and legal RV outlet installation. By following local regulations and completing the application process, you can ensure a smooth installation.

Credit: www.campingcomfortably.com
Electrical Panel Assessment
Before installing a 50 Amp RV outlet at home, assessing your electrical panel is crucial. This evaluation ensures your panel can handle the additional load. It also helps avoid any potential electrical issues. Below are the steps to assess your electrical panel.
Capacity Check
First, check your panel’s capacity. A standard home panel is 100 to 200 amps. Locate the main breaker; it typically shows the panel’s capacity. If the panel is 100 amps, it may struggle with a 50 Amp RV outlet.
Use a table to list your current appliances and their amperage needs:
| Appliance | Amps |
|---|---|
| Air Conditioner | 20-30 |
| Oven | 30-50 |
| Dryer | 30 |
| Water Heater | 20 |
Total these values to get an idea of your existing load. Ensure adding a 50 Amp RV outlet won’t overload your panel.
Upgrading If Necessary
If your panel cannot handle the extra load, consider upgrading it. Contact a licensed electrician for a panel upgrade. They will provide a cost estimate and timeframe. Upgrading to a 200 Amp panel is common. This can support more appliances and the new 50 Amp RV outlet.
An upgrade involves replacing the entire panel. Electricians will also check and possibly upgrade the wiring. This ensures safety and efficiency.
Here is a brief overview of the upgrade process:
- Turn off the main power supply.
- Remove the old panel and wiring.
- Install the new 200 Amp panel.
- Connect the new wiring and breakers.
- Turn on the power and test the new panel.
An upgraded panel can handle modern electrical demands. It will also safely support the new 50 Amp RV outlet.
Installation Steps
Installing a 50 Amp RV outlet at home involves several important steps. Each step requires careful attention to detail for safety and functionality. Let’s break down the process into simple, easy-to-follow steps.
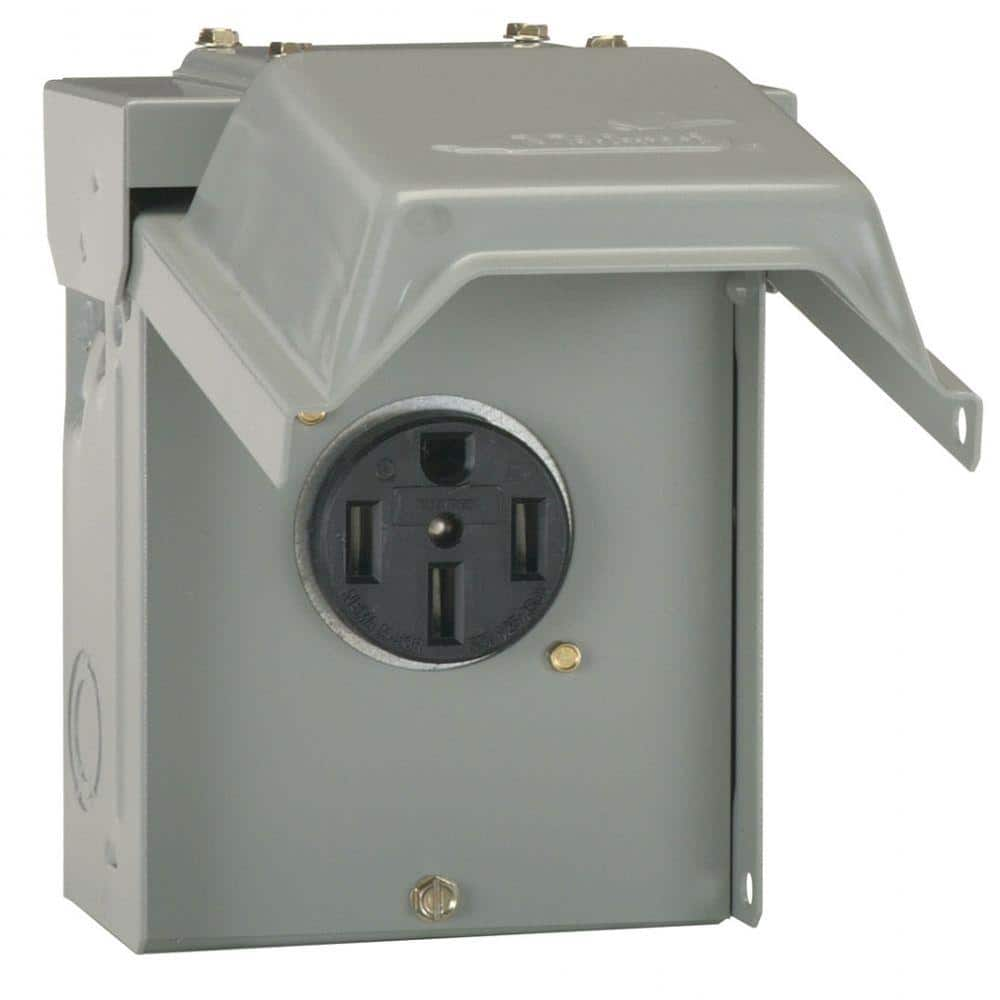
Mounting The Outlet Box
First, choose a location for the outlet box. It should be close to where you park your RV. Make sure the spot is dry and protected from the elements.
Next, mount the outlet box securely to a wall or post. Use screws and anchors to ensure it is firmly in place. The outlet box should be at a comfortable height for easy access.
- Choose a dry, protected location
- Secure the outlet box with screws and anchors
- Ensure the box is at a comfortable height
Connecting The Wiring
Before you start, turn off the power at the main breaker. This step is crucial for safety. Use a voltage tester to confirm the power is off.
Next, run the wires from your main breaker panel to the outlet box. You will need three wires: black (hot), white (neutral), and green or bare (ground). Strip the ends of each wire and connect them to the corresponding terminals on the outlet.
- Turn off the power at the main breaker
- Confirm power is off with a voltage tester
- Run three wires: black, white, and green or bare
- Strip wire ends and connect to outlet terminals
Finally, secure the wires inside the outlet box. Attach the cover plate and turn the power back on at the main breaker. Test the outlet to ensure it is working properly.
Safety tip: If you are not confident in your electrical skills, consider hiring a licensed electrician.
Credit: www.homedepot.com
Testing The Installation
Testing the installation of a 50 Amp RV outlet at home is crucial. This ensures your RV gets the right power. It also keeps you and your RV safe. Follow these steps to test the installation.
Ensuring Proper Voltage
First, check the voltage of the outlet. Use a multimeter for this task. Set the multimeter to AC voltage. Place the probes into the outlet slots. You should get a reading of around 120 volts. If the reading is off, recheck your wiring. Ensuring proper voltage prevents damage to your RV appliances.
Safety Checks
After checking the voltage, perform safety checks. Inspect the outlet for any visible damage. Ensure the outlet is securely mounted. Check that the circuit breaker is not tripping. Use a plug tester to verify the outlet is wired correctly. All these checks are vital for your safety.
Cost Breakdown
Installing a 50 Amp RV outlet at home involves several costs. It’s important to understand each aspect. This breakdown will help you plan your budget effectively.
Material Costs
The materials needed for this installation include the outlet, wiring, and a circuit breaker. Here’s a simple table to show the average costs:
| Material | Average Cost |
|---|---|
| 50 Amp RV Outlet | $20 – $50 |
| Wire (6-gauge) | $0.50 – $2 per foot |
| Circuit Breaker | $10 – $30 |
| Conduit | $1 – $3 per foot |
Material costs can add up quickly. Be sure to measure the distance from your breaker box to the outlet location. This will help you determine the amount of wire and conduit needed.
Labor Costs
Hiring a licensed electrician is recommended for this job. Labor costs can vary based on location and complexity of the installation. Here are the average rates:
- Electrician’s hourly rate: $50 – $100 per hour
- Average installation time: 2 – 4 hours
In total, you might spend between $100 and $400 on labor. This ensures the job is done safely and up to code.
Remember, these are average costs. Your specific situation may vary. Always get multiple quotes to find the best price.
Maintenance Tips
Maintaining a 50 Amp RV outlet at home is crucial. Proper maintenance ensures safety and long-lasting performance. It also helps avoid costly repairs. Here are some essential maintenance tips.
Regular Inspections
Regular inspections are vital for your 50 Amp RV outlet. Check for wear and tear. Look for any signs of damage or corrosion. Inspect the outlet and wiring for any discoloration. Regular inspections help catch issues early. This practice ensures your RV outlet is always in good condition.
Troubleshooting Common Issues
Sometimes, problems may arise with your 50 Amp RV outlet. Learn to troubleshoot common issues. Check if the outlet is receiving power. Confirm the circuit breaker is not tripped. If the outlet is not working, ensure the connections are secure. Look for any visible damage. If problems persist, consider calling a professional electrician. Quick action can prevent further complications.
Frequently Asked Questions
How Much Does It Cost To Install A 50 Amp Rv Outlet?
The cost to install a 50 amp RV outlet ranges from $300 to $800. This includes parts and labor.
Can I Install A 50 Amp Rv Outlet Myself?
Yes, you can install it yourself if you have electrical experience. Otherwise, hire a licensed electrician.
What Components Are Needed For A 50 Amp Rv Outlet?
You will need a 50 amp breaker, outlet box, and 6-gauge wire. These are essential components.
How Long Does It Take To Install A 50 Amp Rv Outlet?
Installation typically takes 2 to 4 hours. It depends on the complexity and location of the installation.
Conclusion
Installing a 50 Amp RV outlet at home can be a smart investment. It offers convenience and flexibility for RV owners. The installation process is straightforward with proper guidance. Costs can vary, but the benefits often outweigh the expenses. Ensure you hire a licensed electrician for safety.
A well-installed outlet can enhance your RV experience. Enjoy the ease of charging and powering your RV at home. With this setup, your adventures await. Start planning your next trip with peace of mind. Safe travels!


