
Retracting an RV awning manually can seem daunting. But it’s quite manageable with the right steps.
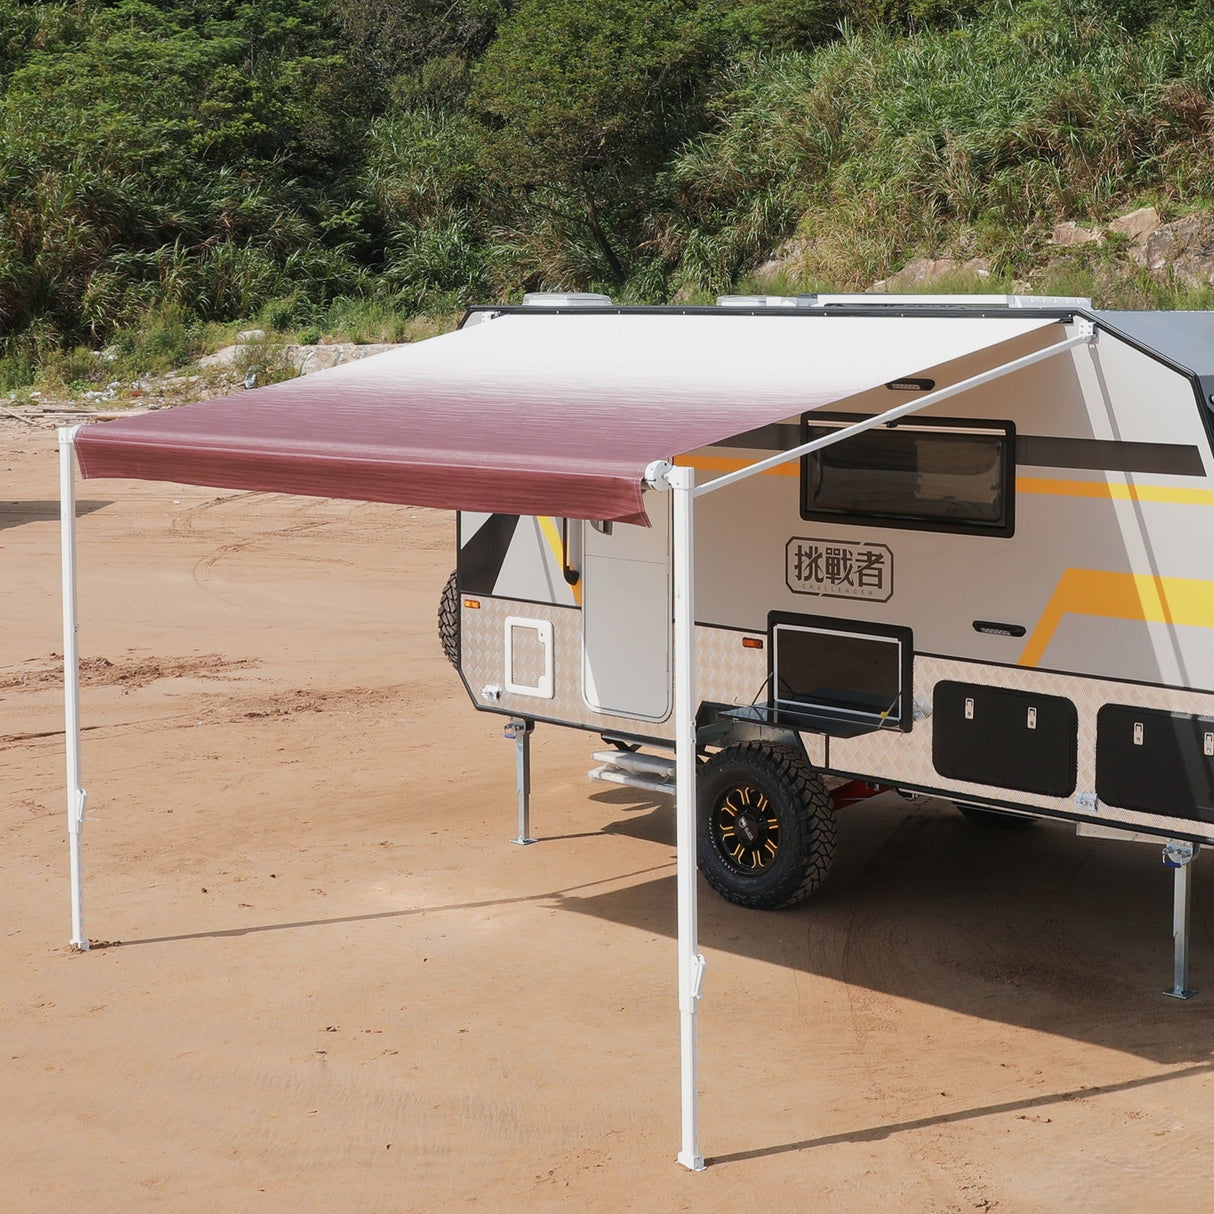
An RV awning provides shade and comfort during your travels. But sometimes, the mechanism may fail, and you need to retract it manually. Knowing how to do this can save you stress and protect your awning from damage. In this guide, you will learn the essential steps to retract your RV awning manually, ensuring you can handle any situation with ease.
Whether you’re a seasoned RV traveler or a beginner, this skill is vital. Let’s dive in and make sure you’re prepared for any awning-related challenge on your next adventure.
Introduction To Manual Retraction
Retracting your RV awning manually can seem daunting at first. But knowing how to do it is essential for every RV owner. This skill ensures you can handle unexpected situations while on the road. This guide will walk you through the basics of manual retraction.
Importance Of Knowing Manual Retraction
Every RV owner should know how to manually retract their awning. It is crucial for emergencies. Electrical systems can fail. Weather can change quickly. In such cases, manual retraction becomes necessary. Without this knowledge, your awning might get damaged. Your trip could be affected.
Common Scenarios For Manual Retraction
Various scenarios might require manual retraction of your RV awning. A sudden storm is a common reason. Strong winds can damage the awning. Electrical malfunctions can also occur. This makes the motorized retraction system useless. Another scenario is during power outages. Without electricity, you need to retract the awning manually.
In some cases, the awning might get stuck. This can happen due to debris or mechanical issues. Knowing how to manually retract helps in these situations. It ensures your awning is safely stored. It prevents further damage.
Safety Precautions
Retracting an RV awning manually can be a bit challenging. Safety should be your top priority. Before starting, make sure you follow these safety precautions to avoid any accidents or injuries.
Necessary Safety Gear
Wearing the right safety gear can protect you from potential hazards.
- Gloves: Protects your hands from cuts and scrapes.
- Safety Glasses: Shields your eyes from debris and dust.
- Closed-Toe Shoes: Prevents foot injuries from falling objects.
- Hard Hat: Guards your head if something falls from above.
Pre-retraction Checks
Before you start retracting the awning, perform these checks:
- Inspect the Awning: Look for any tears or damage.
- Check the Area: Ensure the ground is clear of obstacles.
- Stabilize the RV: Make sure the RV is on a flat surface.
- Secure Loose Items: Remove or secure any items near the awning.
- Engage the Awning Lock: Ensure the lock is in place to avoid sudden movements.
Taking these precautions can help you retract your awning safely.
Tools Required
Retracting an RV awning manually may seem daunting, but with the right tools, it can be a straightforward task. Using the correct tools ensures safety and efficiency. Below, we’ll list the essential and optional tools required for this task.
Essential Tools
- Awning Rod – This tool is crucial for retracting the awning. It allows you to reach and manipulate the awning mechanisms safely.
- Socket Wrench – A socket wrench with a proper size socket is needed to disengage the manual override.
- Step Ladder – A sturdy step ladder helps you reach high parts of the awning easily.
- Gloves – Wear gloves to protect your hands while handling the awning.
Optional Tools
- Flashlight – Useful if you’re working in low light conditions.
- WD-40 – This can help if any parts are rusted or stuck.
- Assistant – Having another person to help can make the process smoother and safer.
| Tool | Purpose |
|---|---|
| Awning Rod | For reaching and manipulating the awning mechanisms. |
| Socket Wrench | To disengage the manual override. |
| Step Ladder | To reach high parts of the awning. |
| Gloves | To protect your hands. |
| Flashlight | For working in low light conditions. |
| WD-40 | To loosen rusted or stuck parts. |
| Assistant | For a smoother and safer process. |
Having these tools on hand makes retracting your RV awning much easier. Being prepared with the right tools ensures you can handle the task efficiently and safely.
Preparation Steps
Before retracting your RV awning manually, follow the necessary preparation steps. Proper preparation ensures a smooth process and avoids damage. Let’s get started with the essential steps.
Clearing The Area
Ensure the area around the awning is clear. Remove any objects that could obstruct the process. Check for furniture, tools, or other items near the awning.
Look for any plants or branches that might interfere. A clear space allows you to work without interruptions. It’s also safer.
Inspecting The Awning
Examine the awning for any damage. Check the fabric for tears or wear. Look at the arms and brackets for signs of rust or bending.
Make sure all screws and bolts are tight. Loose parts can cause problems. Ensure everything is in good condition before proceeding.
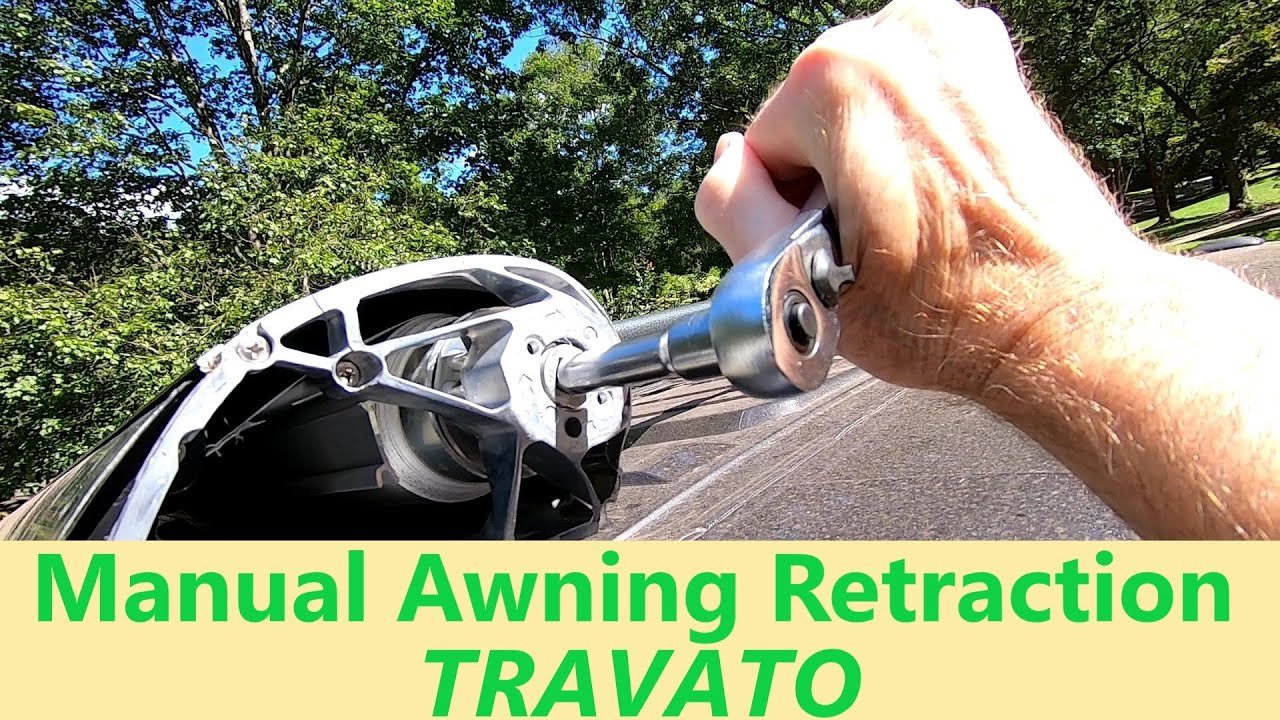
Disengaging The Motor
Disengaging the motor of your RV awning is essential for manual retraction. This process can seem tricky. But with the right steps, you can do it with ease. This section will guide you through locating the motor and the disengagement process.
Locating The Motor
The first step is to find the motor. Most RV awnings have the motor located on one end. Look for a small housing unit. This is typically where the motor resides. Check your RV manual for the exact location.
Disengagement Process
Once you have found the motor, you need to disengage it. Start by turning off the power supply to the awning. This is a safety measure. Next, locate the release lever or switch on the motor housing. This is usually a small lever or button. Press or pull this release mechanism. This action disengages the motor. Now you can manually retract the awning. Ensure you follow all safety guidelines during this process.
Manual Retraction Process
Retracting your RV awning manually might seem daunting. But with clear steps, it becomes manageable. Whether due to a malfunction or power outage, manual retraction is a useful skill. Let’s dive into the manual retraction process.
Step-by-step Instructions
First, gather your tools. You’ll need a winding stick or manual override rod. Locate the awning motor. This is usually near the top of the awning.
Next, insert the winding stick into the motor. Turn the stick slowly. This will retract the awning. Watch the awning as it rolls up. Ensure it retracts evenly.
Continue turning until the awning is fully retracted. Secure the awning in place. Use the locking mechanisms provided. Check that the awning is secure.
Handling Stubborn Awnings
Sometimes, awnings can be stubborn. If your awning won’t retract, check for obstructions. Ensure nothing is blocking the awning’s path. This might include debris or branches.
If the awning is still stuck, apply gentle pressure. Push the awning slightly. This can help dislodge any internal blockages. Be careful not to use too much force.
If all else fails, consult your RV manual. It may offer specific troubleshooting tips. Sometimes, professional help is needed. Don’t hesitate to seek assistance if required.
Securing The Awning
Manually retracting an RV awning involves loosening the tension knobs and slowly rolling the fabric back. Secure the arms in place to ensure stability. Ensure all parts are locked before driving.
Securing the awning is a crucial step in retracting your RV awning manually. This ensures your awning stays intact while on the move. It also prevents damage from wind or movement. Read on to learn how to secure your awning effectively.
Locking Mechanisms
To secure the awning, first focus on the locking mechanisms. Most RV awnings have a lever or knob that locks the awning in place. Make sure the locking lever is in the “lock” position. Check that the knob is tightened securely. This keeps the awning from moving or extending unexpectedly.
Ensuring Stability
Next, ensure the awning is stable. Confirm that the arms are properly aligned and locked. The arms should be straight and parallel to the RV. This prevents any wobbling or shaking. Also, check the tension on the awning fabric. It should be tight and without any slack. This helps in keeping the awning stable and secure. Securing your RV awning properly protects it from potential damage. It also ensures a smooth journey without any unexpected issues.

Credit: www.youtube.com
Post-retraction Maintenance
After retracting your RV awning, proper maintenance is crucial. This ensures the longevity of your awning. Neglecting this step can lead to costly repairs. Here are some post-retraction maintenance tips.
Inspecting For Damage
Thoroughly check the awning for any visible damage. Look for tears, wear, or mold. Inspect the arms and hardware for rust or breaks. Address any issues immediately to prevent further damage.
Routine Maintenance Tips
Regular cleaning of the awning fabric is essential. Use mild soap and water. Avoid harsh chemicals that can weaken the material. Lubricate the moving parts, such as the arms and joints. This ensures smooth operation.
Check the awning’s alignment and tension. Adjust if necessary to avoid strain. Store the awning in a dry place. Moisture can cause mold and mildew. Regular maintenance extends the life of your RV awning. Follow these tips after each use.
Troubleshooting Tips
Dealing with a stuck RV awning can be frustrating. A few troubleshooting tips can help you retract it manually. This section will cover common issues and when to seek professional help. These insights should make the process smoother and less stressful.
Common Issues
Sometimes, the awning won’t retract due to simple problems. The most frequent issue is a jammed mechanism. Dirt and debris can block the gears. Clean the awning arms and check for obstructions. Another common issue is a broken or worn-out spring. Inspect the spring and replace it if needed.
Loose or damaged wires can also cause issues. Check all connections and ensure they are secure. If wires are worn out, replace them. A lack of lubrication can make parts stiff. Apply a suitable lubricant to all moving parts. This can make the retraction smoother.
When To Seek Professional Help
Sometimes, the problem may be too complex to handle alone. If the awning is still stuck after basic troubleshooting, seek professional help. Professionals have the tools and experience needed for complex repairs.
If you notice significant structural damage, such as bent arms or a torn fabric, it’s best to call an expert. Attempting to fix these issues yourself could cause more damage. Safety is important. If you are unsure about the problem, always consult a professional.
Credit: awnluxpro.com
Frequently Asked Questions
How Do I Manually Retract My Rv Awning?
To manually retract your RV awning, use the hand crank to roll it back. Ensure the awning arms are unlocked. Slowly crank the awning until fully retracted. Secure the arms and lock them in place.
What Tools Are Needed To Retract An Rv Awning?
You need a hand crank and a ladder to reach the awning. Make sure the awning arms are unlocked before starting.
Can I Retract An Electric Awning Manually?
Yes, you can retract an electric awning manually. Use the manual override procedure detailed in your owner’s manual. Usually, it involves a hand crank.
Why Won’t My Rv Awning Retract?
If your RV awning won’t retract, check for obstructions or mechanical issues. Ensure the awning arms are unlocked and inspect for any damage.
Conclusion
Retracting your RV awning manually is straightforward. Follow the steps carefully. Always ensure safety first. Keep your tools handy. Regularly check for any awning damage. Consistent maintenance prolongs awning life. Practice these steps occasionally. You’ll gain confidence over time. Enjoy your RV adventures.
Stay safe and happy traveling!


