

Insulating your RV water hose is essential in cold weather. It prevents freezing and ensures a steady water supply.
Traveling in your RV offers freedom and adventure. But, when temperatures drop, your water hose can freeze, leaving you without water. Proper insulation can save you from this hassle. Insulating a water hose keeps water flowing and prevents damage. It’s a simple process that can make a big difference.
This guide will show you how to insulate your RV water hose. You’ll find easy steps and useful tips to keep your water running, even in the coldest weather. Let’s dive in and protect your RV from the cold!
Importance Of Insulating Rv Water Hoses
Insulating your RV water hoses is crucial. It ensures your water supply stays consistent, especially in cold weather. Insulation helps maintain the hose’s durability and extends its lifespan. Let’s explore why insulating RV water hoses is important.
Preventing Freezing
Freezing temperatures can cause RV water hoses to freeze. This blocks the water flow. Insulating your hoses prevents this problem. It keeps the water inside from freezing. This ensures you have a steady water supply even in winter.
Avoiding Hose Damage
Frozen hoses can crack or burst. This leads to costly repairs or replacements. Insulated hoses stay flexible in cold weather. They resist damage and last longer. Insulation protects your investment and saves money.
Types Of Insulation Materials
Insulating your RV’s water hose is essential for preventing it from freezing. The right insulation material makes all the difference. Let’s look at the different types of insulation materials you can use.
Foam Tubing
Foam tubing is a popular choice for insulating RV water hoses. It is easy to install and affordable. The foam material wraps around the hose, providing a layer of protection. Foam tubing also helps to maintain water temperature. This is crucial for both cold and hot weather.
Heat Tape
Heat tape is another effective insulation material. It works by generating heat to keep the water hose warm. This is particularly useful in extremely cold conditions. Heat tape is easy to apply. Simply wrap it around the hose and plug it in.
Pipe Wrap
Pipe wrap is a flexible insulation material. It consists of fiberglass or foam. Pipe wrap is easy to use and provides excellent insulation. Just wrap it around the hose and secure it with tape or zip ties. It is lightweight and durable, making it a great option for RVs.
Choosing The Right Insulation
Choosing the right insulation for your RV water hose is crucial. The correct insulation keeps water flowing, even in freezing temperatures. Let’s explore some factors that will help you make the best choice.
Climate Considerations
First, think about the climate you travel in. If you often visit cold areas, choose thick insulation. It provides better protection against freezing temperatures. In milder climates, thinner insulation may suffice. Always match the insulation to the expected weather conditions.
Budget And Availability
Your budget plays a significant role in choosing insulation. Foam insulation is affordable and readily available. It is easy to install and effective for most situations. Heat tape is another option. It costs more but offers excellent protection in extreme cold.
Check local stores and online for availability. Sometimes, certain types of insulation are easier to find. This can influence your decision, especially if you need it quickly.
Credit: www.adventurousway.com
Step-by-step Insulation Process
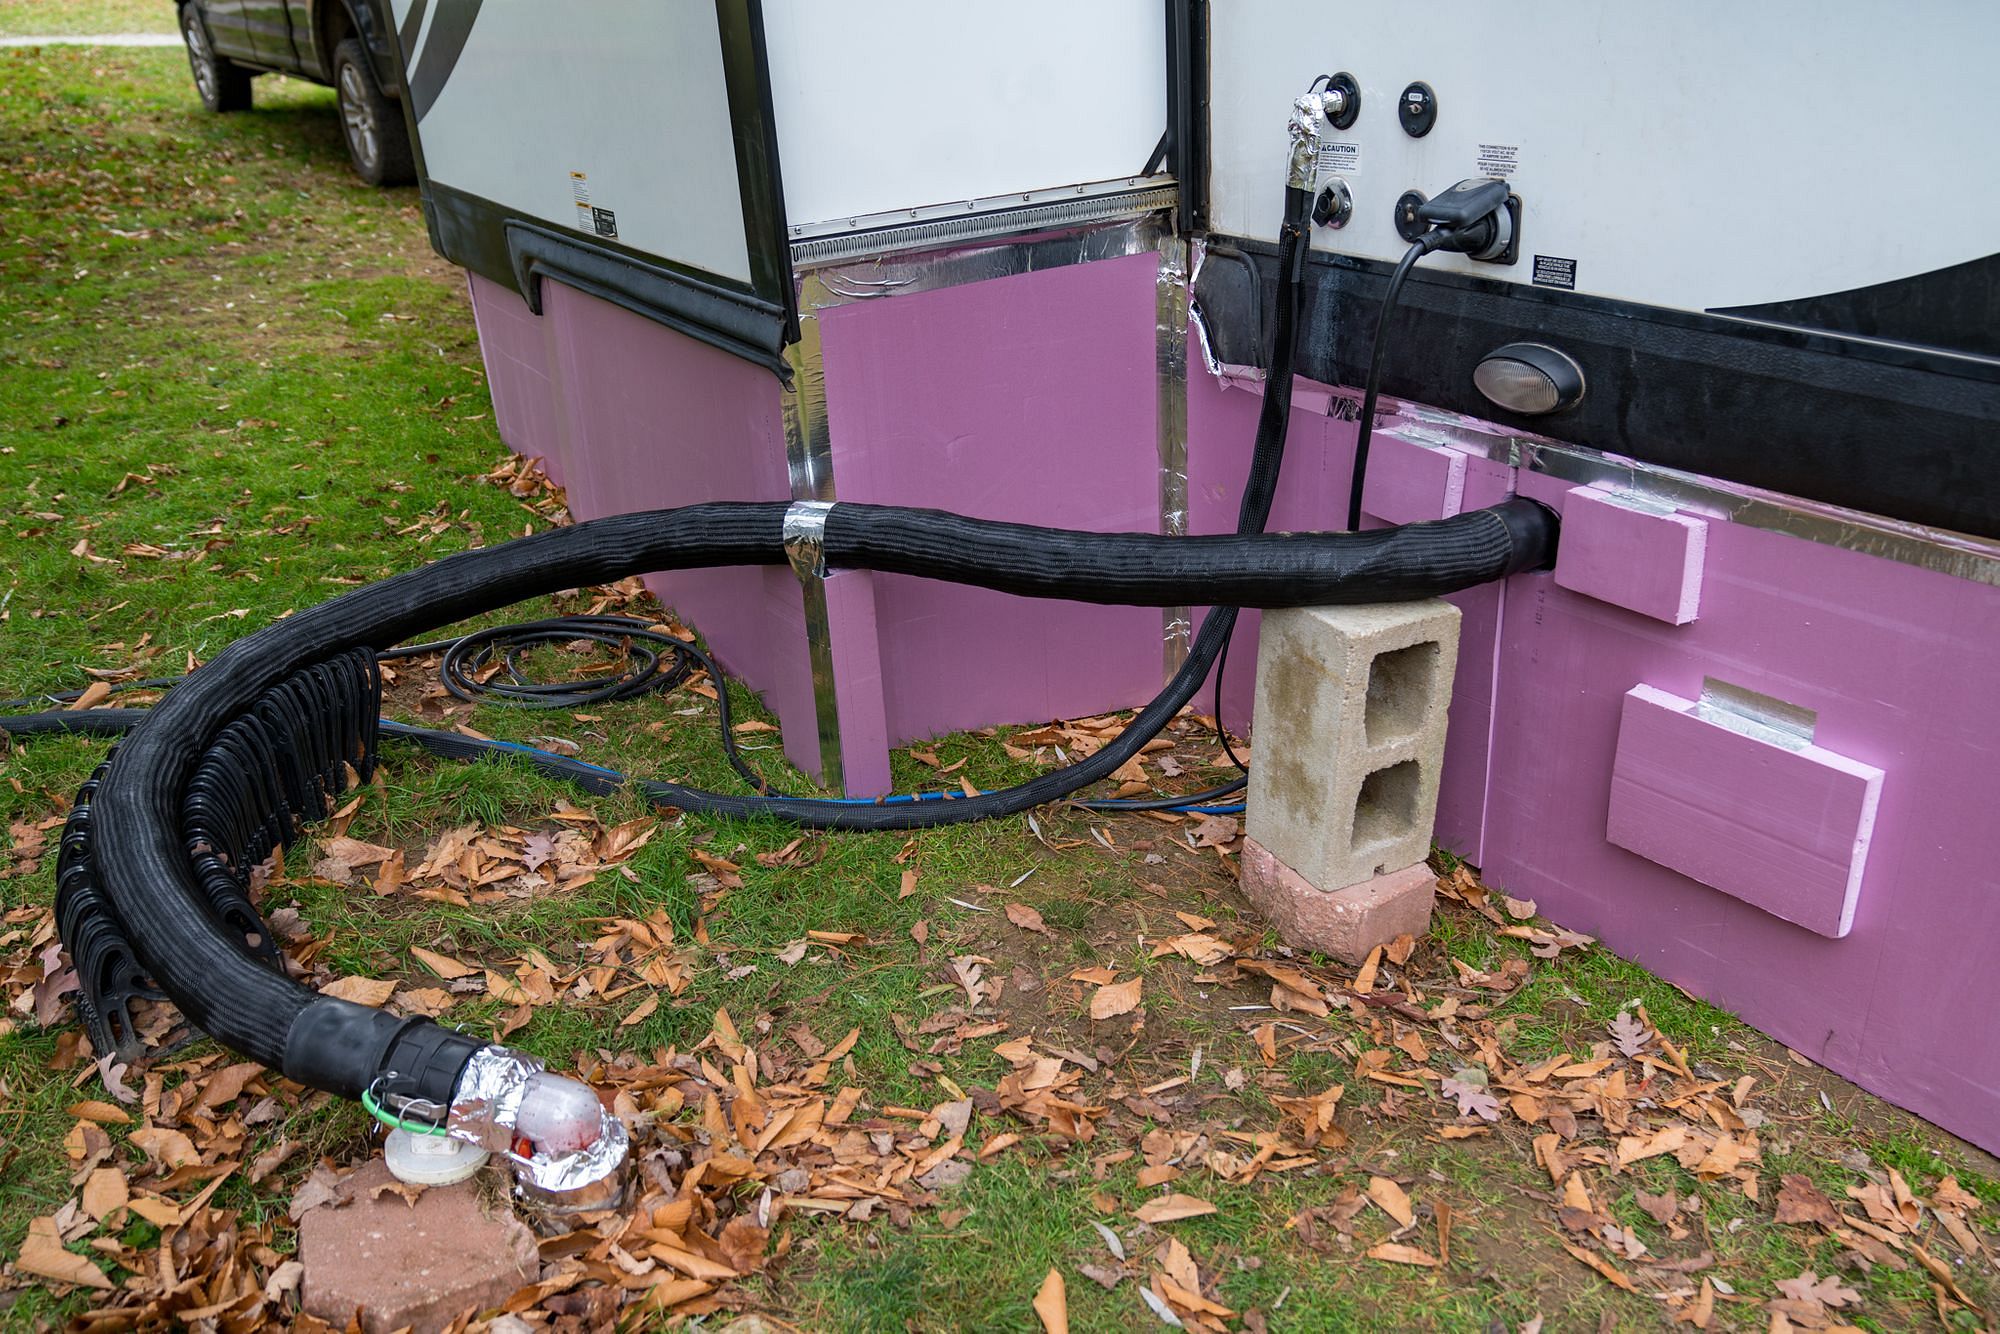
Insulating your RV’s water hose can be a lifesaver in cold weather. It prevents the hose from freezing and ensures a steady water supply. Follow this step-by-step process to keep your water flowing smoothly, even in chilly temperatures.
Preparing The Hose
First, gather all the needed materials. You will need foam tubing, heat tape, electrical tape, and zip ties. Make sure the water hose is clean and dry. Lay the hose out straight and untangled. This makes the insulation process easier and more effective.
Applying Foam Tubing
Next, measure and cut the foam tubing to match the length of your hose. Carefully slide the hose into the foam tubing. Ensure the tubing covers the entire length of the hose. Press the edges of the tubing to seal any gaps. This helps keep the cold out and the heat in.
Securing With Heat Tape
Wrap the heat tape around the foam-covered hose. Start at one end and work your way to the other. Make sure the tape is evenly spaced. Do not overlap the tape to avoid overheating. Use electrical tape to secure the ends of the heat tape. Finally, use zip ties to hold everything in place. This added security ensures the insulation stays intact.
Additional Tips For Winterizing Rv Water Hoses
Winterizing your RV water hoses is essential for preventing damage. While insulating is crucial, there are other important steps to ensure your water hoses function well in cold weather.
Using Hose Covers
Hose covers provide an extra layer of protection. They help keep the cold out and the heat in. Choose covers made of durable materials. Foam or fabric covers are ideal. They are easy to wrap around the hose. Secure them with zip ties or Velcro straps. This method enhances insulation and prevents freezing.
Storing Hoses Properly
Proper storage of hoses is vital. Drain all water from the hose before storage. Water left inside can freeze and cause damage. Coil the hose neatly. Avoid kinks and twists. Store the hose in a dry, warm place. A storage bin or hose reel works well. This keeps the hose safe from cold temperatures. Regularly check the hose for any wear or cracks. Replace any damaged parts to maintain efficiency.
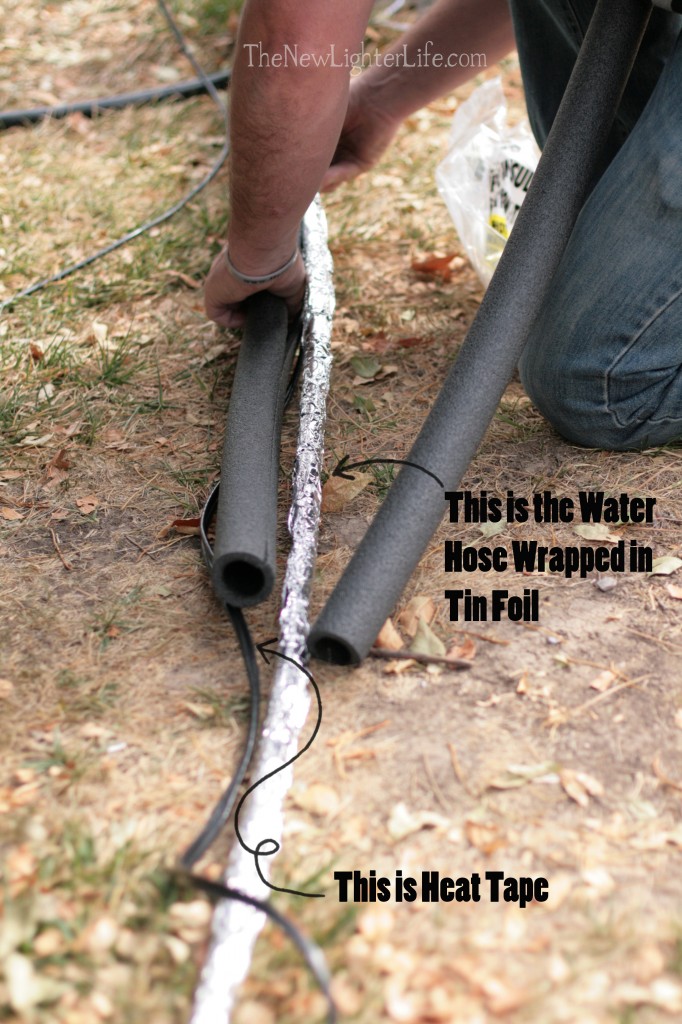
Credit: thenewlighterlife.com
Common Mistakes To Avoid
Insulating your RV’s water hose can prevent freezing in cold weather. But it’s easy to make mistakes that reduce the effectiveness of the insulation. Understanding and avoiding these mistakes can save you time, money, and headaches. Let’s look at some common pitfalls.
Improper Application
One of the biggest mistakes is applying insulation incorrectly. Ensure the entire length of the hose is covered without gaps. A single exposed section can lead to freezing.
- Incomplete Coverage: Ensure you cover all areas of the hose.
- Poor Adhesion: Use quality tape or fasteners. Loose insulation won’t work well.
- Overlapping: Don’t overlap too much. This wastes material and doesn’t improve insulation.
Ignoring Weather Conditions
Another common mistake is not considering weather conditions. Different weather requires different insulation methods.
| Weather Condition | Insulation Tips |
|---|---|
| Extreme Cold | Use thicker insulation or heat tape. |
| Mild Cold | Standard foam insulation should suffice. |
Pay attention to weather forecasts and adjust your insulation accordingly. This ensures your hose stays protected no matter the conditions.
Maintaining Insulated Hoses
Keeping your RV water hose insulated is crucial during cold weather. It helps prevent freezing and ensures a steady water supply. Regular maintenance keeps your hose in good shape. This section covers key steps for maintaining insulated hoses.
Regular Inspections
Check your insulated hose often. Look for cracks or wear. Make sure the insulation is secure and intact. Regular inspections help catch issues early. This prevents bigger problems down the road.
Repairing Damage
If you find damage, fix it quickly. Small cracks can lead to leaks. Use waterproof tape to seal minor cracks. For larger damage, consider replacing the hose. Proper repairs keep your hose working efficiently.

Credit: www.wikihow.life
Benefits Of Proper Insulation
Proper insulation of your RV water hose offers multiple benefits. These benefits contribute to a smooth and hassle-free RV experience. Below, we highlight some key advantages.
Enhanced Durability
Insulating your water hose increases its lifespan. It protects against harsh weather conditions. This means less wear and tear over time. An insulated hose is less likely to crack or break. This saves you money in the long run. You won’t need to replace it as often. An insulated hose also resists UV damage. This is crucial during summer months.
Consistent Water Flow
Proper insulation ensures a steady water flow. In cold weather, uninsulated hoses can freeze. This disrupts your water supply. An insulated hose keeps the water temperature stable. It prevents freezing and thawing cycles. You’ll have a reliable water source year-round. Consistent water flow means better showers. It also means easier dishwashing and cooking.
Frequently Asked Questions
Why Insulate Rv Water Hoses?
Insulating RV water hoses prevents freezing in cold temperatures. It ensures a steady water supply. It also protects the hose from damage.
What Materials Are Best For Insulation?
Foam pipe insulation and heat tape are effective materials. Both provide adequate protection against freezing temperatures. They are also easy to install.
How To Install Foam Pipe Insulation?
Measure the hose’s length and cut the foam accordingly. Slide the foam over the hose. Secure it with tape or zip ties.
Can Heat Tape Be Used On Rv Water Hoses?
Yes, heat tape can be used. Wrap it around the hose. Plug it into a power source to keep the hose warm.
Conclusion
Insulating your RV water hose is essential. It prevents freezing and damage. Use foam tubes or heat tape. Wrap the hose tightly. Secure everything with duct tape. Protecting your water hose saves you trouble later. It ensures a steady water supply.
An insulated hose is a smart investment. Stay prepared for colder weather. Your RV adventures will be more enjoyable. Simple steps can make a big difference. Keep your water flowing year-round.


