
Emptying the fresh water tank on an RV is crucial for maintenance. It keeps your water supply clean and prevents damage.
Traveling in an RV gives you the freedom to explore. But maintaining your RV is just as important. One key task is emptying the fresh water tank. Doing this regularly keeps your water fresh and prevents buildup of harmful bacteria.
It also ensures your RV’s water system works efficiently. Whether you’re a seasoned RVer or a newbie, knowing how to empty the tank is essential. In this guide, we’ll walk you through the steps to do it safely and effectively. Let’s dive in and keep your RV’s water system in top shape!
Credit: www.youtube.com
Preparation
Before you start emptying your RV’s fresh water tank, proper preparation is crucial. Taking the right steps will ensure a smooth and efficient process. Let’s break down the steps to help you get ready.
Gather Necessary Tools
First, gather all the necessary tools. You’ll need a hose, a bucket, and possibly a wrench. These items will help you drain the tank properly. Make sure they are clean and in good condition.
Choose A Suitable Location
Next, choose a suitable location to empty the tank. Find a place where the water can drain safely. Avoid areas where water could damage plants or property. Many campgrounds have designated dumping stations. These are ideal spots for draining your tank.
Safety Precautions
Emptying the fresh water tank on your RV is a necessary task. Ensuring you follow proper safety precautions is crucial. This helps to prevent accidents and maintain the health of your RV’s water system. Below are some key safety steps to consider.
Turn Off Water Supply
First, turn off the water supply. This prevents water from flowing during the emptying process. Locate the water pump switch inside your RV. Turn it off. This stops the pump from running. If connected to a city water hookup, disconnect it. This ensures no water enters the system while you work.
Wear Protective Gear
Wear protective gear. This includes gloves and safety glasses. Gloves protect your hands from dirt and chemicals. Safety glasses shield your eyes from splashes. Make sure your gear is comfortable and fits well. Proper protection helps you avoid injuries during the process.
Locate The Drain Valve
Maintaining your RV’s fresh water tank is crucial for a smooth trip. Emptying the tank regularly prevents stale water and keeps the system clean. A key step in this process is locating the drain valve. This guide will help you find and identify the drain valve on your RV.
Check The User Manual
Your RV’s user manual is the best place to start. It contains specific details about your model. The manual will have diagrams and instructions. These will show where the drain valve is located. Follow the steps in the manual for accurate guidance.
Identify The Valve Under Rv
Once you have the manual, head outside. Look underneath your RV. The drain valve is usually near the fresh water tank. It may be a small lever or a cap. Some RVs have labels marking the valve. If you can’t find it, refer back to the manual.
Make sure the RV is on level ground. This ensures all the water drains out. Open the valve slowly. Allow the water to flow out completely. Close the valve once the tank is empty.
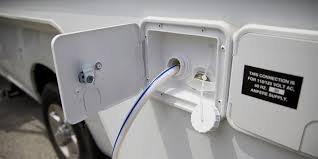
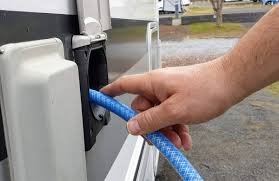
Attach A Hose
Emptying the fresh water tank on your RV involves several steps. One important step is to attach a hose. This ensures that the water drains properly and does not create a mess. Follow these simple steps to attach a hose correctly.
Select Appropriate Hose
Choose a hose that fits your RV’s drain valve. Make sure the hose is long enough to reach a safe drainage area. The hose should be clean and free from any kinks or damage.
Secure Hose To Drain Valve
Locate the drain valve on your RV’s fresh water tank. Attach the hose to the valve securely. Tighten the connection to prevent leaks. Check that the hose is firmly in place before opening the valve.
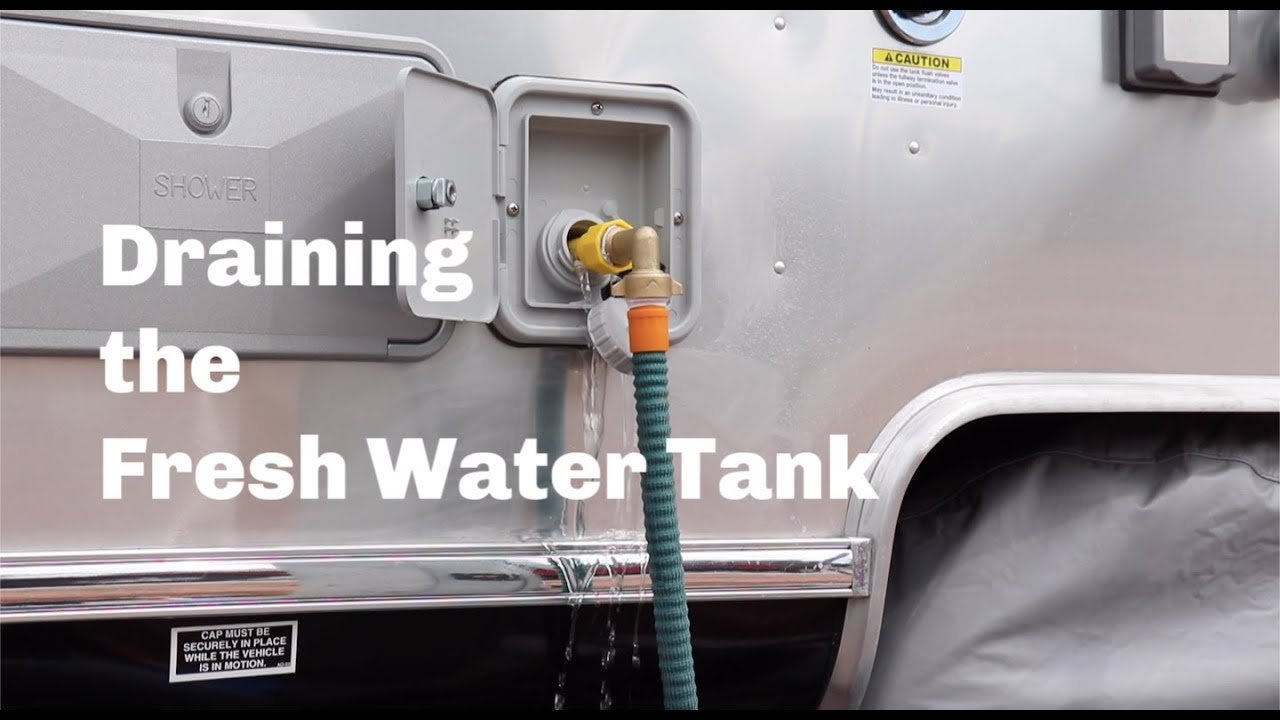
Open The Drain Valve
Emptying the fresh water tank on your RV is essential for maintenance. The first step is to open the drain valve. This simple task ensures your RV is ready for storage or the next adventure. Below are the steps to follow.
Turn Valve Counterclockwise
Locate the drain valve under your RV. Turn the valve counterclockwise to open it. This action releases the water. Make sure you have a bucket or hose ready. It helps to direct the water flow properly.
Monitor Water Flow
After opening the valve, monitor the water flow. Ensure the water drains completely. This step prevents any leftover water from stagnating. It also helps in avoiding any potential damage to the tank.
| Step | Description |
|---|---|
| 1 | Locate the drain valve |
| 2 | Turn valve counterclockwise |
| 3 | Monitor water flow |
- Prepare a bucket or hose to direct water flow.
- Check for any blockages in the drain.
- Ensure the valve is fully open.
- Turn valve counterclockwise.
- Watch the water flow.
- Close the valve once the tank is empty.
  // Example of turning valve
  if (valveStatus === 'closed') {
    turnValve('counterclockwise');
  }
Credit: www.keystoneforums.com
Flush The Tank
Flushing the fresh water tank in your RV is essential. It helps maintain clean and safe water for your trips. Regular flushing removes sediment and bacteria buildup. Follow these steps for a thorough flush.
Use Fresh Water
Begin by filling the tank with clean, fresh water. Ensure the water source is reliable. Avoid using untreated or questionable water. Turn on the water pump and let it run for a few minutes. This helps circulate fresh water through the system.
Ensure Complete Drainage
Locate the drain valve of the tank. Open the valve to let the water out. Make sure all water drains completely. You might need to tilt the RV slightly. This helps ensure no water remains in the tank.
After draining, close the valve securely. Your tank is now ready for fresh water again. Regular flushing keeps the tank clean and your water safe.
Close The Drain Valve
To empty the fresh water tank on your RV, close the drain valve. This stops water from flowing out. Ensure it is tightly shut to prevent leaks.
Emptying your RV’s fresh water tank is essential. One key step is closing the drain valve. This step ensures all water is drained properly. It also prevents any leaks or spills.
Turn Valve Clockwise
First, locate the drain valve on your RV. It is usually near the bottom of the tank. Use your hand to turn the valve clockwise. This action will close the valve. Make sure it is tightly closed. A loose valve might cause leaks.
Remove Hose Carefully
After closing the valve, you need to remove the hose. Do this step carefully. Hold the hose firmly at the connection point. Gently twist and pull it away from the valve. Avoid pulling too hard. This can damage the hose or the valve. Following these steps helps maintain your RV. It also keeps your fresh water tank in good condition. Closing the drain valve properly is crucial. It prevents any unwanted water flow. “`
Final Checks
After draining your RV’s fresh water tank, final checks are crucial. These steps ensure your system is in top shape. Let’s explore the last important tasks.
Inspect For Leaks
Examine the tank and surrounding area for any leaks. Look closely at joints and connections. Even small drips can lead to bigger problems. Use a flashlight to inspect hard-to-see areas. Catching leaks early can save you time and trouble.
Clean Up The Area
Clear any debris or tools from the work area. A clean space reduces the risk of accidents. Wipe down surfaces to remove any spilled water. Proper clean-up ensures your RV stays in excellent condition. Your next trip will start without a hitch.
Final checks might seem minor but they are essential. They ensure your RV’s fresh water system is ready for the road. Enjoy peace of mind on your journey.
Frequently Asked Questions
How To Locate The Fresh Water Tank On An Rv?
The fresh water tank is usually located underneath the RV. Check the owner’s manual for specific details. It’s often near the rear or side of the vehicle.
What Tools Are Needed To Empty An Rv Fresh Water Tank?
You typically need a hose and a bucket. Some RVs have a built-in drainage system. Consult the RV manual for any specific tools required.
Can I Empty The Fresh Water Tank Anywhere?
No, you should empty the tank in a designated dump station. This prevents environmental contamination. Always follow local regulations for disposing of RV water.
How Often Should I Empty My Rv Fresh Water Tank?
Empty your RV fresh water tank after every trip. This prevents bacteria buildup and keeps the water fresh. Regular maintenance ensures a healthy water system.
Conclusion
Emptying your RV’s fresh water tank is a simple task. Follow the steps mentioned above to ensure a smooth process. Regular maintenance is crucial for your RV’s longevity. Always keep your tanks clean and in good condition. This prevents issues and ensures safe water for your travels.
Remember, a well-maintained RV makes every trip more enjoyable. Stay proactive with your RV care, and you’ll avoid future problems. Safe travels and happy camping!


