
A failing RV AC capacitor can ruin your trip. The capacitor is crucial for the AC’s startup and operation.
Replacing a Dometic RV AC capacitor might seem daunting. But, with the right guidance, it’s manageable. This blog will help you understand the process and steps involved. We’ll explain why the capacitor is important. And, how to identify if it needs replacement.
Whether you’re a seasoned RV owner or a newbie, this guide will simplify the task. Stay cool and comfortable on your travels by learning how to replace your Dometic RV AC capacitor efficiently. Read on to ensure your AC runs smoothly all summer long.
Tools And Materials
Replacing the capacitor in your Dometic RV air conditioner can seem daunting. But with the right tools and materials, the task becomes manageable. Below, we will outline the necessary tools and required materials for this process. This will help you complete the replacement efficiently and safely.
Necessary Tools
To replace the capacitor, you will need a few basic tools. These tools will ensure you can complete the job without any issues.
- Phillips screwdriver
- Flathead screwdriver
- Needle-nose pliers
- Multimeter
- Insulated gloves
- Safety goggles
- Socket set
Each of these tools has a specific purpose. The screwdrivers will help you open the unit. The pliers will assist in handling wires. The multimeter will check the capacitor’s health. Insulated gloves and safety goggles will protect you. The socket set will remove any bolts or screws.
Required Materials
Gathering the right materials is crucial for a smooth replacement process. Here’s what you need.
- Replacement capacitor
- Electrical tape
- Wire connectors
- Owner’s manual
The replacement capacitor should match your unit’s specifications. Electrical tape will secure any exposed wires. Wire connectors will ensure proper connections. The owner’s manual will guide you through the process.
With these tools and materials ready, you can replace your Dometic RV AC capacitor. This will ensure your air conditioner runs smoothly.
Safety Precautions
Replacing a Dometic RV AC capacitor requires careful handling to avoid electric shock. Always disconnect power before starting. Wear safety gloves and use insulated tools.
Replacing a Dometic RV AC capacitor requires taking certain safety steps. These steps ensure your protection and the proper functioning of your AC. It is crucial to follow them diligently.Power Off Procedures
Before starting, turn off your RV’s main power. This prevents any accidental electrical shocks. Locate the circuit breaker and switch it off. Confirm the power is off by using a voltage tester. This ensures the unit is safe to work on. Never skip this step.Protective Gear
Wear protective gloves to avoid injuries. Gloves protect your hands from sharp edges. Additionally, use safety goggles to shield your eyes. Tiny particles can cause harm. Also, ensure you are wearing rubber-soled shoes. These shoes prevent slips and provide insulation. Always prioritize safety gear during the process. “`Removing The Old Capacitor
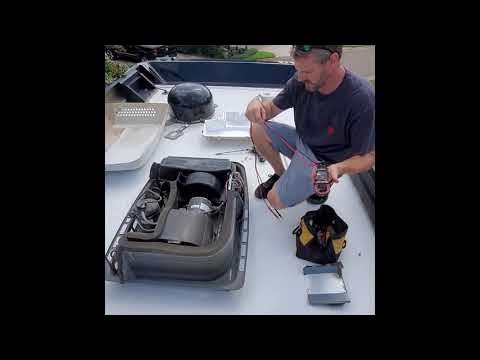
Replacing the capacitor in your Dometic RV AC unit is essential for maintaining efficiency. Removing the old capacitor might seem daunting, but with the right steps, it is manageable. This guide will help you through the process.
Accessing The Ac Unit
First, locate the AC unit on your RV roof. You need a ladder to reach it safely. Ensure the RV is parked on level ground. Safety is paramount. Turn off the power to the AC unit. This prevents any electrical hazards.
Remove the cover of the AC unit. Use a screwdriver to unscrew any bolts or screws. Keep the screws in a safe place. You will need them later. Set the cover aside carefully.
Disconnecting The Capacitor
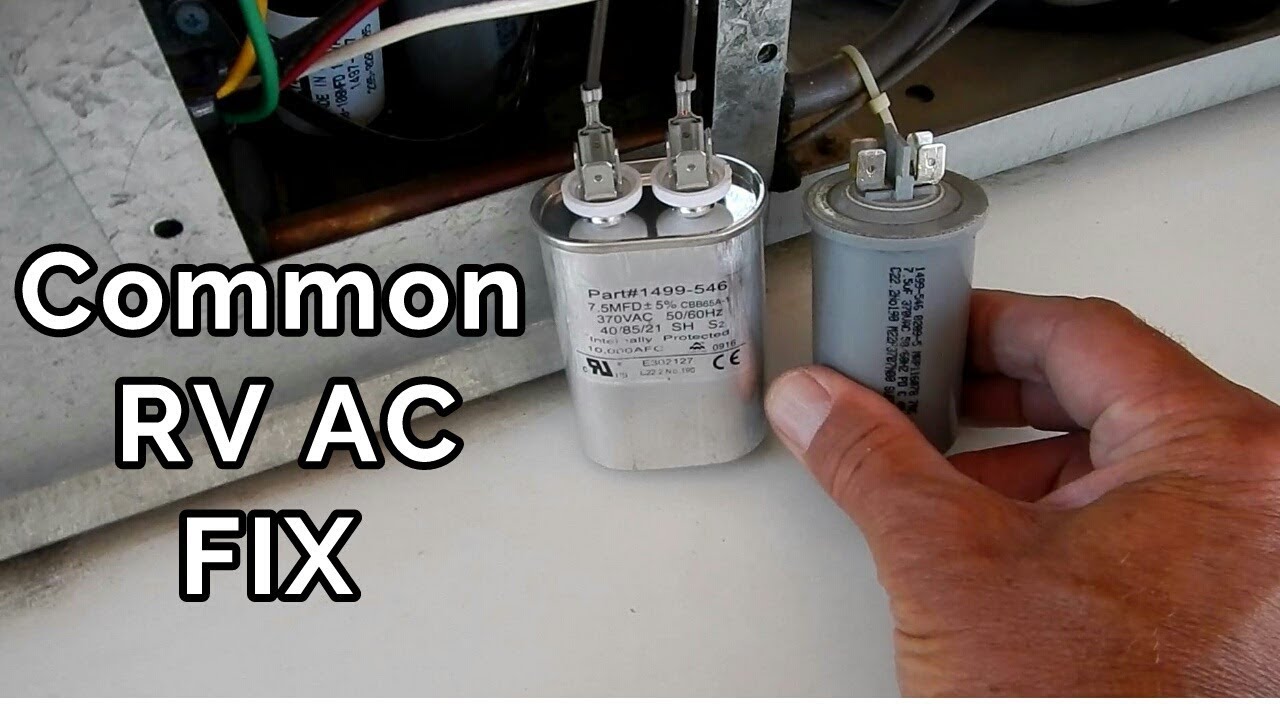
Next, find the capacitor. It is usually a cylindrical or oval-shaped component. Identify the wires connected to it. Take a picture or make a note of the connections. This helps when you connect the new capacitor.
Use an insulated tool to disconnect the wires. Capacitors can store charge even when the power is off. Handle with care. Discharge the capacitor by shorting its terminals with a screwdriver, using an insulated handle.
Once discharged, remove the mounting bracket or clamp holding the capacitor. Carefully lift the old capacitor out. Place it aside for proper disposal.
Now, you are ready to install the new capacitor. Follow the steps in reverse to complete the process. Safety first. Ensure all connections are secure before powering the unit back on.
Choosing The Right Replacement
Replacing your Dometic RV AC capacitor is crucial for a well-functioning air conditioner. Selecting the correct replacement involves understanding its specifications. You also need to know where to buy it. This guide will walk you through both steps.
Matching Specifications
When selecting a new capacitor, ensure it matches the old one’s specifications. Look for the following details:
- Voltage – This should match exactly.
- Microfarads (µF) – Ensure the same rating.
- Type – Identify if it is a start or run capacitor.
Using the wrong capacitor can damage your AC unit. Double-check these values on your old capacitor. If you are unsure, refer to your AC’s manual.
Purchasing Tips
Buying the right capacitor is as important as installing it correctly. Here are some tips:
- Trusted Vendors – Purchase from reputable stores.
- Warranty – Ensure it comes with a warranty.
- Return Policy – Check if returns are accepted.
Many online platforms sell capacitors. Compare prices and read reviews before buying. Ensure the capacitor fits your budget without compromising quality.
Installing The New Capacitor
Replacing the capacitor in your Dometic RV air conditioner can seem daunting. But with the right steps, you can do it easily. Here’s how to install the new capacitor.
Connecting The Wires
Begin by identifying the wires. Each wire should match a terminal on the capacitor. Look at the labels on both the wires and the capacitor. Common labels include ‘HERM’, ‘FAN’, and ‘C’. Connect the wires according to these labels. Use a wrench to tighten the connections. Ensure each wire is secure. Loose wires can cause problems.
Securing The Capacitor
Once the wires are connected, place the capacitor in its holder. Make sure it fits snugly. Use screws to secure the capacitor. Tighten the screws with a screwdriver. The capacitor should not move. A secure capacitor ensures proper function. Double-check your work. Ensure all connections are tight and the capacitor is firmly in place.
Credit: www.youtube.com
Testing The Ac Unit
After replacing the capacitor in your Dometic RV AC unit, it’s crucial to test the unit. This ensures everything works correctly. Testing the AC unit involves a few simple steps. These steps help confirm the AC is functioning as it should.
Powering On
First, power on the AC unit. Make sure the RV is connected to a reliable power source. Turn on the AC from the control panel. Listen for any unusual sounds when it starts. A working unit should start smoothly without strange noises. If you hear any odd sounds, there may be other issues to address.
Checking For Proper Function
Next, check the AC for proper function. Set the thermostat to a low temperature. This will engage the cooling cycle. Feel the air coming out of the vents. The air should be cool within a few minutes. If it’s not, there may be a problem with the compressor or refrigerant levels.
Use a thermometer to measure the air temperature. The temperature should drop consistently. If it doesn’t, this could indicate an issue. Ensure the fan is running smoothly as well. A functioning fan helps distribute cool air evenly.
| Step | Action | Expected Result |
|---|---|---|
| 1 | Power on the AC unit | Unit starts without unusual noises |
| 2 | Set thermostat to low temperature | Cooling cycle starts |
| 3 | Check air temperature | Air is cool within a few minutes |
| 4 | Ensure fan operation | Fan runs smoothly, distributing air evenly |
Finally, let the unit run for a while. Observe its performance over time. Consistent cooling indicates a successful capacitor replacement. This ensures a comfortable environment in your RV.
Maintenance Tips
Maintaining your Dometic RV AC capacitor is essential for optimal performance. Regular upkeep helps avoid unexpected failures. Here are some vital maintenance tips to keep your AC in top shape.
Regular Inspection
Perform regular inspections of your AC unit. Check the capacitor every few months. Look for any signs of wear or damage.
- Inspect the capacitor for any bulging or leaks.
- Ensure all connections are tight and secure.
- Listen for unusual noises from the AC unit.
Document each inspection. This helps track the condition over time. A simple table can help:
| Inspection Date | Condition | Notes |
|---|---|---|
| Jan 2023 | Good | No issues found |
| Apr 2023 | Fair | Slight noise detected |
Signs Of Capacitor Failure
Recognizing the signs of a failing capacitor can save you from bigger issues. Here are common signs:
- AC not blowing cold air: A failing capacitor may cause the AC to blow warm air.
- Frequent cycling: The unit turns on and off more often.
- Strange noises: Buzzing or humming noises can indicate a problem.
Address these signs immediately. This prevents further damage to the AC unit.
Maintaining your Dometic RV AC capacitor ensures a comfortable and cool environment. Regular inspections and recognizing failure signs are key.

Credit: pantherrvproducts.com

Credit: www.amazon.com
Frequently Asked Questions
What Is A Dometic Rv Ac Capacitor?
A Dometic RV AC capacitor helps start and run the air conditioner. It stores electrical energy and provides the necessary boost.
How To Identify A Faulty Rv Ac Capacitor?
A faulty RV AC capacitor may cause the AC unit to struggle to start, hum, or fail to cool properly.
Can I Replace A Dometic Rv Ac Capacitor Myself?
Yes, you can replace it yourself. Ensure you follow safety precautions, disconnect power, and consult your AC’s manual.
What Tools Are Needed For Rv Ac Capacitor Replacement?
You will need a screwdriver, needle-nose pliers, and a multimeter to safely replace the RV AC capacitor.
Conclusion
Replacing your Dometic RV AC capacitor is essential for smooth operation. A functional capacitor ensures your AC runs efficiently. Regular checks prevent unexpected breakdowns. It’s a simple process with the right tools. Always prioritize safety. Switch off power before starting.
Seek professional help if unsure. Keep your RV cool and comfortable. Happy traveling with a reliable AC system!


