
Replacing your Carrier RV air conditioner may seem daunting. It’s crucial for comfort on the road.
Understanding the process can help make it simpler and stress-free. An RV air conditioner keeps your mobile home cool during hot weather. Over time, these units may wear out or break. Replacing them ensures you stay comfortable during your travels.
This guide will walk you through the steps of replacing your Carrier RV air conditioner. You’ll learn what to look for, how to choose the right model, and tips for installation. Stay with us as we explore everything you need to know about this essential RV maintenance task.
Introduction To Rv Air Conditioners
Traveling in an RV offers freedom and adventure. But comfort is key. An RV air conditioner plays a crucial role. It keeps the interior cool during hot days. This ensures a pleasant journey. Without a good AC, trips can become unbearable.
Importance Of A Reliable Ac
A reliable air conditioner improves your travel experience. It provides consistent cooling. This helps maintain a comfortable environment inside your RV. During summer, temperatures can soar. A dependable AC ensures you stay cool. It also prevents heat-related issues. This includes dehydration and heat stroke. A good AC can also extend the life of your RV’s interior. It prevents damage caused by excessive heat.
Types Of Rv Air Conditioners
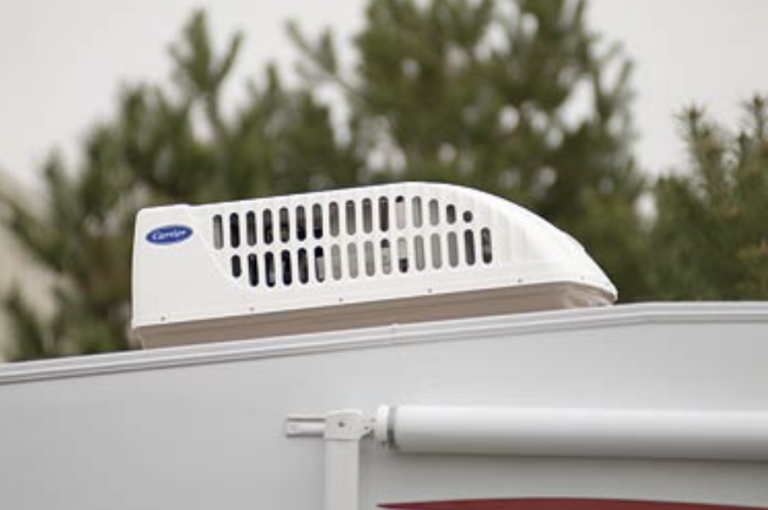
There are several types of RV air conditioners. Each has its own benefits. The most common type is the rooftop unit. This type is mounted on top of the RV. It saves space inside. Another type is the portable unit. This can be moved around as needed. It is flexible and easy to store. Window units are also popular. These are installed in a window. They are cost-effective and simple to install. Finally, ducted units distribute air through vents. They provide even cooling throughout the RV.

Credit: www.amazon.com
Signs Your Rv Ac Needs Replacement
A Carrier RV air conditioner replacement may be needed if your unit blows warm air or makes strange noises. Poor cooling and unusual sounds often signal a failing AC. Prompt replacement ensures comfortable travels.
Traveling in an RV during summer can be a joy. The air conditioner keeps the inside cool and comfortable. But, an old or failing AC can ruin the experience. How do you know if your RV AC needs replacement? Here are some key signs to watch out for.
Poor Cooling Performance
Does your RV feel warm even with the AC on? This may be a sign. An effective AC should cool the RV quickly. If it takes longer than usual, there might be a problem. Inconsistent cooling or warm air from the vents also indicate trouble. These issues suggest the AC is not working well.
Unusual Noises And Leaks
Strange sounds coming from the AC are a red flag. Loud humming, rattling, or grinding noises mean something is wrong. These sounds could point to a failing motor or loose parts. Water leaks around the unit are another concern. Leaks can lead to mold and damage. If you notice these signs, consider replacing the AC. Pay attention to these signs to ensure a comfortable RV experience. A well-functioning AC makes your travels enjoyable. “`
Choosing The Right Replacement Unit
Replacing a Carrier RV air conditioner is a big decision. It impacts your comfort on the road. Choosing the right unit is essential. This section will guide you through key considerations. We’ll also suggest top brands and models.
Factors To Consider
- Cooling Capacity: Measure in BTUs. Higher BTUs cool larger spaces.
- Power Consumption: Check the unit’s wattage. Energy-efficient units save money.
- Size and Fit: Ensure the new unit fits your RV roof opening.
- Noise Level: Look for quieter models. They enhance comfort.
- Installation Ease: Some units are easier to install. Check the instructions.
- Warranty: A good warranty offers peace of mind. Check the duration and coverage.
Top Brands And Models
| Brand | Model | Key Features |
|---|---|---|
| Dometic | Brisk II | High BTU, Quiet, Easy to Install |
| Advent | ACM150 | Energy Efficient, Compact, Affordable |
| Airexcel | Mach 15 | High Cooling Capacity, Durable, Reliable |
Choosing a reliable brand ensures a long-lasting unit. Dometic, Advent, and Airexcel are top choices. They offer various models to meet different needs.
Credit: rvshare.com
Preparation For Replacement
Replacing a Carrier RV air conditioner can seem daunting. Proper preparation is key. Ensuring you have all the tools, materials, and knowledge will make the task easier. Follow these steps to ensure a smooth replacement process.
Gathering Tools And Materials
Before starting, gather the necessary tools and materials. This will save time and effort. Here is a list of items you will need:
- New Carrier RV air conditioner unit
- Screwdrivers (Phillips and flat-head)
- Adjustable wrench
- Drill and bits
- Putty knife
- Sealant or gasket
- Ladder
- Work gloves
- Cleaning supplies
Ensure you have the correct replacement unit. Check the model number and compatibility. Having everything ready will streamline the process.
Safety Precautions
Safety is paramount when replacing your RV air conditioner. Follow these safety precautions:
- Turn off all power sources. Disconnect the RV from any power supply.
- Wear protective gear. Use gloves and safety glasses.
- Use a stable ladder. Ensure the ladder is on even ground.
- Have a helper. Working with a partner can prevent accidents.
- Check for secure footing. Make sure the roof is dry and free of debris.
Following these precautions will keep you safe. Always double-check your work environment. Safety should never be compromised.
Step-by-step Replacement Guide
Replacing your Carrier RV air conditioner might seem daunting, but this step-by-step guide will make it easier. Follow these steps to ensure a smooth and successful replacement process.
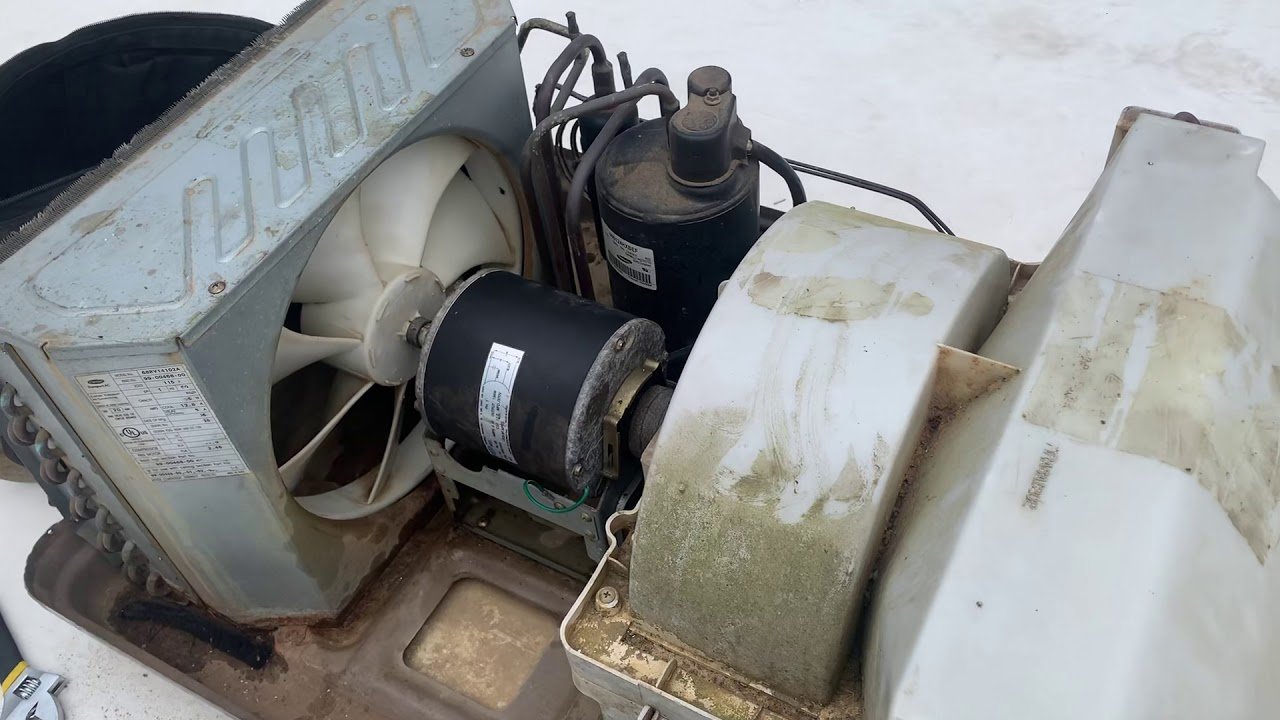
Removing The Old Unit
First, disconnect the power supply to avoid any electrical hazards. Carefully remove the interior cover of the air conditioner. This will expose the mounting bolts and screws. Use a screwdriver to loosen and remove these bolts. Gently lift the old unit off the roof. Be cautious not to damage the roof during removal. Clean the area where the old unit sat to ensure a good seal for the new unit.
Installing The New Unit
Position the new air conditioner unit over the mounting hole on the roof. Ensure it is aligned properly. Carefully lower it into place. Secure the unit by tightening the mounting bolts. Reconnect the electrical wiring according to the manufacturer’s instructions. Place the interior cover back on and secure it with screws. Finally, turn the power supply back on and test the new air conditioner to ensure it works properly.
Maintenance Tips For Longevity
Maintaining your Carrier RV air conditioner is essential for its longevity. Regular maintenance ensures efficient operation and prevents unexpected breakdowns. Below are some maintenance tips to help you keep your air conditioner in top condition.
Regular Cleaning
Cleaning your air conditioner is vital. Dust and debris can clog the system, reducing efficiency. Follow these steps:
- Turn off the unit and unplug it for safety.
- Remove the air filter and clean it with warm soapy water.
- Rinse the filter thoroughly and let it dry completely before reinstalling.
- Wipe down the exterior of the unit with a damp cloth.
For the best results, clean the air filter once a month. This ensures proper airflow and keeps the unit running smoothly.
Seasonal Check-ups
Seasonal check-ups are crucial to identify potential issues early. Schedule these check-ups before peak usage times:
| Season | Tasks |
|---|---|
| Spring | Inspect coils, check refrigerant levels, and clean the exterior. |
| Fall | Check for wear and tear, clean the air filter, and inspect the thermostat. |
Regular inspections help you catch small issues before they become big problems. This can save you money and extend the life of your air conditioner.
Troubleshooting Common Issues
Experiencing issues with your Carrier RV air conditioner can be frustrating. Knowing how to troubleshoot common problems can save time and money. In this section, we will discuss some frequent issues and how to address them.
Startup Problems
If your Carrier RV air conditioner does not start, first check the power supply. Ensure the unit is properly plugged in and the circuit breaker is not tripped. A malfunctioning thermostat can also prevent startup. Verify that the thermostat is set to the correct mode and temperature. If the issue persists, inspect the unit’s capacitors. Faulty capacitors can hinder the air conditioner from starting. Replacing them might resolve the problem.
Inefficient Cooling
Inadequate cooling can stem from several sources. First, check the air filter. A dirty filter restricts airflow and reduces cooling efficiency. Clean or replace the filter as needed. Next, inspect the coils. Dirty or frozen coils can impede cooling. Clean the coils and ensure they are free of frost. Another common cause is low refrigerant levels. If the refrigerant is low, there might be a leak. Consult a professional technician to recharge the refrigerant and fix any leaks.
| Issue | Possible Cause | Solution |
|---|---|---|
| Startup Problems | Power Supply | Check plug and circuit breaker |
| Thermostat | Set correct mode and temperature | |
| Capacitors | Replace faulty capacitors | |
| Inefficient Cooling | Dirty Filter | Clean or replace filter |
| Dirty/Frozen Coils | Clean coils, remove frost | |
| Low Refrigerant | Recharge refrigerant, fix leaks |

Credit: m.youtube.com
Frequently Asked Questions
How Do I Replace My Rv Air Conditioner?
To replace your RV air conditioner, first, disconnect the power. Remove the old unit, install the new one, and secure it. Reconnect the power, and test the new unit to ensure it’s working properly.
What Tools Are Needed For Rv Ac Replacement?
For RV AC replacement, you’ll need a screwdriver, wrench, sealant, and ladder. Ensure you have all tools ready before starting the replacement process.
Can I Replace My Rv Ac Myself?
Yes, you can replace your RV AC yourself. Follow the manufacturer’s instructions carefully. If unsure, consult a professional to avoid any damage.
How Long Does Rv Ac Replacement Take?
Replacing an RV AC typically takes 2 to 4 hours. This depends on your experience and the specific model of the AC unit.
Conclusion
Replacing your Carrier RV air conditioner ensures comfort during your travels. You will enjoy better cooling and a more pleasant journey. This upgrade can save you from heat and discomfort. It’s a wise investment for frequent travelers. Ensure you choose the right unit for your RV.
Installation can be straightforward if you follow the instructions. Stay cool and enjoy your adventures with a reliable air conditioner. Your trips will be much more enjoyable. Safe travels!


