
RV delamination can be a significant problem for many RV owners. It affects the outer layers of the RV, causing them to separate and bubble.
Before and after RV delamination repair photos show dramatic transformations. Understanding the repair process can help you appreciate the effort involved. Delamination occurs when moisture gets between the layers of the RV’s exterior. This can weaken the structure and cause visible damage.
Repairing this issue is crucial to maintain the RV’s integrity and appearance. Seeing the results of a successful repair can be motivating. It shows that with the right steps, an RV can look and function like new again. This blog post will explore the steps and benefits of repairing RV delamination.
Identifying Rv Delamination
RV delamination happens when the outer layer of your RV’s wall separates from the inner layer. This can cause significant damage and impact the look and feel of your RV. Knowing how to identify RV delamination early can save you both time and money.
Signs To Look For
There are several signs that indicate RV delamination. Look for bubbles or blisters on the exterior walls. These are usually the first signs of trouble. You might also see cracks or peeling paint. If you notice these, inspect your RV closely.
Another sign is soft spots on the walls. Press gently on the walls; if they feel soft or spongy, delamination is likely. Also, check for water stains inside the RV. These can signal that moisture has entered the walls.
Common Causes
RV delamination can occur due to several reasons. Water damage is the most common cause. When water seeps through the walls, it breaks down the adhesive layers. This causes the walls to separate.
Poor manufacturing or installation can also lead to delamination. If the RV was not built or repaired correctly, the walls might not hold together well. Another factor is prolonged exposure to sunlight. UV rays can weaken the adhesives over time.
Finally, impact damage from accidents or debris can cause delamination. Even small dents or scratches can lead to bigger problems if not addressed promptly.
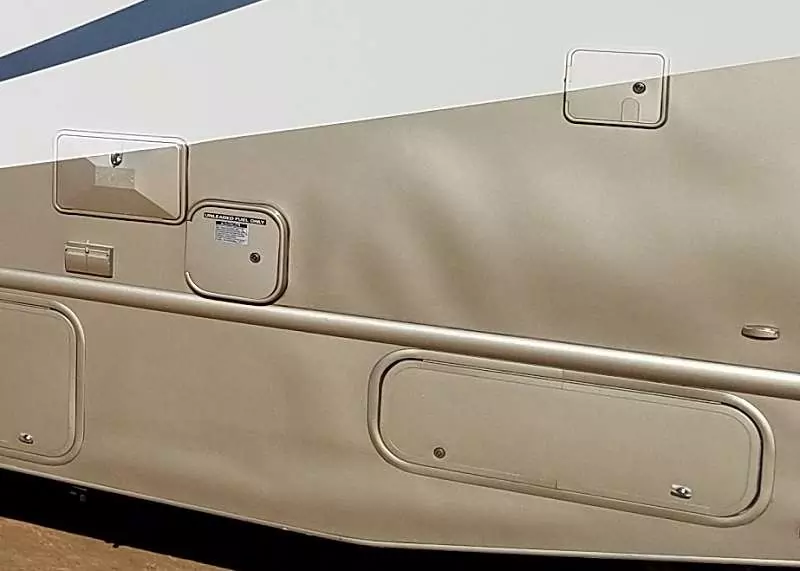
Credit: www.rvwithtito.com
Assessing The Damage
Before starting RV delamination repair, it’s crucial to assess the damage. This step helps identify the extent of the problem. Proper assessment ensures the right repair methods. Below, we’ll explore some key techniques.
Inspection Techniques
Begin with a visual inspection. Check for bubbles or cracks on the RV’s surface. These signs indicate delamination. Use a flashlight to see clearly.
Next, press gently on the suspected areas. Soft spots suggest damage underneath. A moisture meter can help. It detects water inside the walls. Water is a common cause of delamination.
Evaluating Severity
After identifying the damage, evaluate its severity. Small bubbles may only need minor repairs. Large or multiple bubbles require more work. Check if the delamination affects structural parts. If so, immediate repair is necessary.
Consider the age of your RV. Older models may have more extensive damage. Also, factor in the location of the delamination. Delamination near windows or doors might lead to leaks. Prioritize these areas for repair.
Preparing For Repair
Before diving into RV delamination repair, it’s crucial to prepare well. Taking the right steps ensures a smooth process and successful results. This section covers everything you need to know about getting ready for the repair.
Gathering Tools And Materials
First, gather all the necessary tools and materials. Here’s a list to get you started:
- Utility knife – For cutting through damaged material.
- Putty knife – To remove old adhesive and debris.
- Epoxy resin – Essential for bonding new layers.
- Sandpaper – For smoothing surfaces.
- Clamps – To hold materials in place while they dry.
- Protective gloves – For safety during the repair.
- Masking tape – Useful for marking areas.
Safety Precautions
Safety is paramount during any repair project. Follow these precautions to ensure your safety:
- Always wear protective gloves to avoid skin irritation.
- Use a mask when working with epoxy resin to prevent inhalation of fumes.
- Keep your work area well-ventilated to avoid buildup of harmful chemicals.
- Wear safety goggles to protect your eyes from dust and debris.
- Ensure all tools are in good condition to prevent accidents.
By preparing properly, you set yourself up for a successful RV delamination repair. Gather your tools, follow safety precautions, and you’re ready to start the repair process.
Step-by-step Repair Process
Repairing RV delamination can seem challenging. But with clear steps, it becomes manageable. This section will guide you through the repair process. Follow these steps to restore your RV’s exterior.
Removing Affected Areas
First, locate the delaminated areas. Use a sharp knife to cut around them. Carefully peel away the damaged laminate. Clean the exposed surface to remove any debris or old adhesive. Ensure the area is smooth and dry before proceeding.
Applying New Laminate
Choose a new laminate that matches your RV. Cut it to the required size. Apply a strong adhesive to the cleaned surface. Press the new laminate firmly in place. Smooth out any air bubbles using a roller. Allow the adhesive to dry completely.
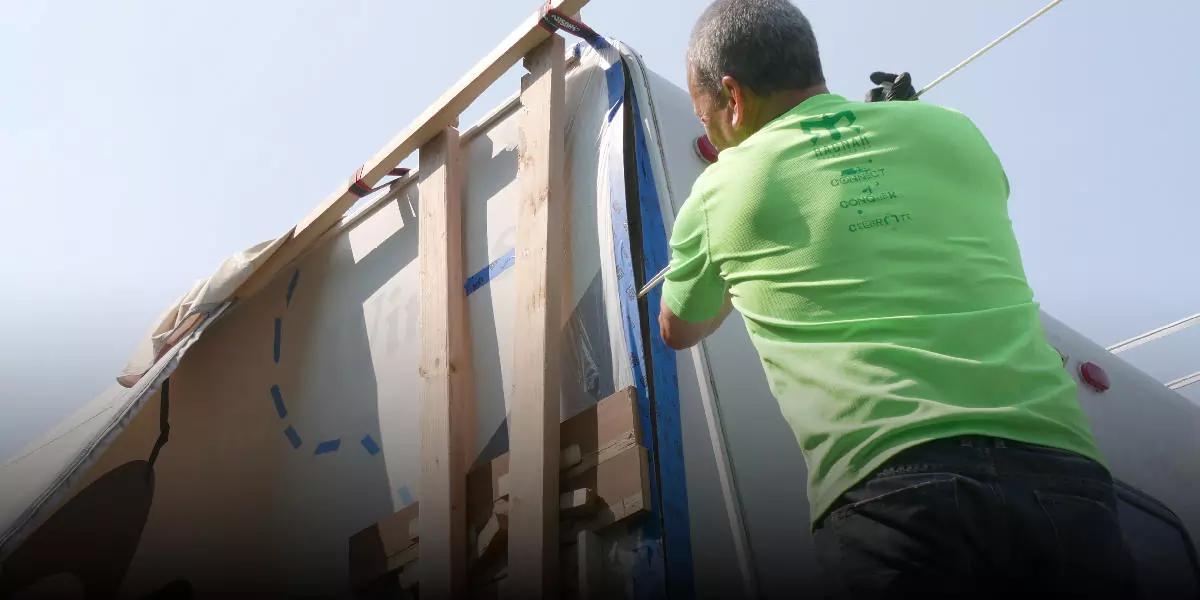
Post-repair Inspection
After completing an RV delamination repair, conducting a thorough post-repair inspection is crucial. This ensures the repair is successful and your RV remains in top condition. A detailed inspection helps identify any issues that may need further attention.
Ensuring Proper Adhesion
Check the repaired area for proper adhesion. Gently press on the surface. It should feel solid and secure. Any soft spots indicate poor bonding. Examine the edges of the repair. Ensure there are no gaps or loose sections. A strong bond prevents future delamination.
Checking For Leaks
Inspect for any signs of leaks. Water damage can cause delamination to reoccur. Use a flashlight to spot damp areas. Check around windows, seams, and joints. Look for discoloration or mold. Ensure all seals are intact and watertight. Test the repair by spraying water over the area. Watch for any water penetration inside the RV.

Credit: m.youtube.com
Preventing Future Delamination
Preventing future delamination in your RV is crucial for maintaining its value and safety. Regular maintenance and protective measures can help keep your RV in top condition. Below are some actionable tips and strategies to prevent delamination.
Regular Maintenance Tips
- Inspect Seals and Seams: Check seals and seams regularly. Look for cracks or gaps.
- Clean the Exterior: Wash your RV’s exterior. Remove dirt and debris that can damage the surface.
- Check for Leaks: Regularly inspect the roof and windows for leaks. Fix them immediately to prevent water damage.
- Store Properly: When not in use, store your RV in a covered area. This protects it from the elements.
Protective Measures
| Measure | Description |
|---|---|
| Use a Cover | Invest in a high-quality RV cover. It shields your vehicle from UV rays, rain, and snow. |
| Apply Sealant | Apply a waterproof sealant to the roof and seams. This adds an extra layer of protection. |
| Use a Dehumidifier | Place a dehumidifier inside your RV. This reduces moisture levels and prevents mold. |
By following these simple tips, you can significantly reduce the risk of delamination. Regular maintenance and proper protective measures ensure your RV remains in great shape for years to come.
Before And After Comparisons
RV delamination can significantly affect the appearance and performance of your vehicle. Observing the before and after comparisons reveals the true impact of a repair. Below, we explore the visual transformations and performance improvements post-repair.
Visual Transformations
A visual transformation is the most noticeable change after an RV delamination repair. The exterior appearance greatly improves.
- The bulges and bubbles on the surface disappear.
- The RV looks smooth and even.
- The original color and design are restored.
Take a look at the table below to see the before and after differences:
| Before Repair | After Repair |
|---|---|
| Visible bulges and bubbles. | Smooth, even surface. |
| Peeling paint or decals. | Restored color and design. |
| Cracks and gaps in the exterior. | Sealed and intact surface. |
Performance Improvements
Performance improves significantly after delamination repair. Here’s how:
- Structural integrity is restored, making the RV safer.
- Reduced risk of water damage.
- Improved insulation leading to better temperature control.
These improvements contribute to a longer lifespan for your RV. It’s not just about appearance; it’s also about enhancing functionality.

Credit: www.youtube.com
Success Stories
RV delamination repair can be transformative. Many RV owners have shared their success stories, detailing how their vehicles went from worn and damaged to like-new condition. These real-life examples highlight the effectiveness of professional delamination repair services. They also provide inspiration and hope for those facing similar challenges.
Customer Testimonials
Here are some testimonials from satisfied RV owners:
- John S.: “My RV looked terrible with all the delamination. After the repair, it looks brand new. The team did an amazing job.”
- Lisa M.: “The bubbling on my RV walls was a nightmare. The repair process was smooth, and the results exceeded my expectations.”
- Michael T.: “I was worried about the cost, but the repair was worth every penny. My RV is now in perfect condition.”
Expert Advice
Our experts offer tips for maintaining your RV post-repair:
- Regular Inspections: Check your RV for signs of delamination every few months.
- Proper Cleaning: Use gentle cleaning products to avoid damaging the exterior.
- Sealant Application: Reapply sealant on seams and joints to prevent water intrusion.
These steps can help you maintain your RV’s condition and prevent future delamination issues. Following expert advice can make a significant difference in the longevity of your repair.
Frequently Asked Questions
What Is Rv Delamination?
RV delamination occurs when the outer layer separates from the inner layers. This can cause bubbles and warping. It often results from water damage.
How Do You Fix Rv Delamination?
RV delamination can be fixed by injecting adhesive into the separated area. Clamps are used to hold it in place. Professional help may be required.
How Can I Prevent Rv Delamination?
To prevent RV delamination, regularly inspect and seal your RV. Address any water leaks immediately. Proper maintenance is essential.
Is Rv Delamination Repair Expensive?
The cost of RV delamination repair varies. Minor repairs may be inexpensive. Extensive damage can be costly. Professional assessment is recommended.
Conclusion
RV delamination repair can transform your vehicle. Before repair, issues like water damage and warping are common. After the repair, your RV looks good as new. The process enhances durability and extends your RV’s lifespan. This ensures a smoother, safer journey.
Regular maintenance helps prevent future delamination. Trust professionals for quality results. Your RV deserves the best care. Enjoy your travels with peace of mind.


