

Understanding an RV distribution panel wiring diagram is essential for any RV owner. It helps in managing electrical systems efficiently and safely.
An RV’s electrical system can seem complex, but it’s crucial for a comfortable journey. The distribution panel is the heart of this system, distributing power to various appliances and outlets. Knowing how to read a wiring diagram can save time, money, and prevent potential electrical issues.
This guide will provide clear insights into understanding and using an RV distribution panel wiring diagram, making your RV adventures smoother and stress-free. Let’s dive into the details and simplify this vital aspect of RV maintenance.
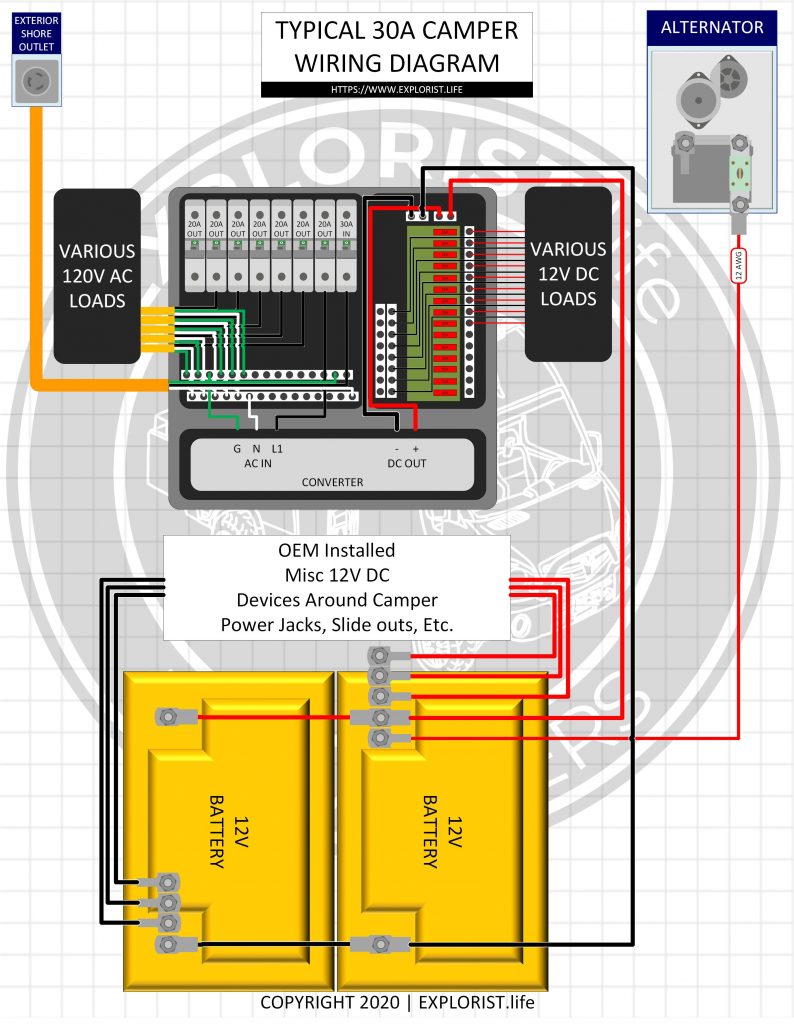
Credit: explorist.life
Introduction To Rv Electrical Systems
Owning an RV means enjoying the freedom of the open road. But, it also requires understanding some technical aspects. One such essential component is the RV electrical system. This system ensures all your appliances and devices work properly during your travels. Let’s dive into its importance and common components.
Importance Of A Proper Electrical System
A proper electrical system in your RV is crucial for several reasons:
- It powers all your essential appliances and devices.
- It ensures your safety by preventing electrical hazards.
- It provides comfort and convenience while on the road.
Imagine being miles away from civilization and your refrigerator stops working. Or worse, an electrical malfunction causes a fire. A well-maintained electrical system prevents such scenarios.
Common Components In Rv Electrical Systems
Your RV’s electrical system consists of several key components. Each plays a vital role in ensuring the system runs smoothly.
| Component | Description |
|---|---|
| Battery | Powers your RV when not connected to external power sources. |
| Inverter | Converts DC power from the battery to AC power for appliances. |
| Converter | Changes AC power to DC power to charge the battery. |
| Distribution Panel | Distributes power to various circuits and appliances. |
| Circuit Breakers | Protects your system from electrical overloads. |
Understanding these components helps in troubleshooting issues. It also ensures you can explain problems to a technician if needed. Proper knowledge of your RV’s electrical system makes your travel experience smoother and safer.
Credit: www.livesmallridefree.com
Understanding Rv Distribution Panels
Understanding RV distribution panels is essential for any RV owner. These panels are the heart of your RV’s electrical system. They manage the flow of electricity to different parts of your RV. Knowing how they work can help you maintain your RV better. It can also prevent electrical issues.
Role Of The Distribution Panel
The distribution panel controls the power supply in your RV. It ensures that each appliance gets the right amount of electricity. This panel also protects your RV from electrical overloads. If there is too much current, the panel will shut off the power. This prevents damage to your RV’s electrical components.
Types Of Distribution Panels
There are two main types of distribution panels. These are AC distribution panels and DC distribution panels. AC panels handle alternating current, which powers most large appliances. DC panels handle direct current, which powers smaller devices and lights.
Some RVs have combined panels. These panels manage both AC and DC power. Understanding your RV’s panel type is crucial. It helps in troubleshooting and maintenance tasks.
Tools And Materials Needed
Wiring an RV distribution panel can seem daunting. But, with the right tools and materials, it becomes manageable. This guide will help you understand what you need before starting the project. Gather these tools and materials to ensure a smooth wiring process.
Essential Tools For Wiring
- Wire Strippers: These are essential for removing the insulation from wires.
- Multimeter: Use this to check voltage and continuity.
- Crimping Tool: Necessary for making secure wire connections.
- Screwdrivers: Both flathead and Phillips are needed for various screws.
- Needle-Nose Pliers: Perfect for bending and shaping wires.
- Utility Knife: Handy for cutting insulation and trimming wires.
Required Materials And Safety Gear
| Materials | Safety Gear |
|---|---|
|
|
Step-by-step Wiring Guide
Wiring an RV distribution panel might seem complex. With clear steps, you can complete it safely. This guide will help you through the process. Follow each step carefully to ensure proper setup.
Preparing Your Workspace
Begin by turning off all power sources. Safety first! Gather all needed tools. You will need screwdrivers, wire strippers, and a multimeter. Make sure you have the correct wiring diagram for your RV model. Double-check your materials to avoid interruptions.
Connecting The Main Power Supply
Identify the main power supply cable. This cable connects to your RV’s external power source. Strip the insulation from the ends of the wires. Connect the ground wire to the grounding bus bar. Secure it tightly. Connect the neutral wire to the neutral bus bar. Ensure the connection is firm.
Next, connect the hot wire to the main circuit breaker. Tighten the screws to hold the wire in place. Check all connections. Ensure they are secure and properly aligned. Test with a multimeter to verify voltage. This ensures everything is connected correctly.
Wiring Individual Circuits
Wiring individual circuits in an RV distribution panel ensures a safe and efficient electrical system. Each circuit serves a specific purpose, such as powering lights or appliances. Understanding how to wire these circuits can prevent electrical issues and improve your RV experience.
Lighting Circuits
Lighting circuits power all the lights in your RV. Use a 12-volt system for most RV lighting needs. First, connect the light fixtures to the circuit. Then, run wires from the fixtures to the distribution panel. Ensure the wires are of the correct gauge. This prevents overheating and potential fires. Test the connections before finalizing the setup. Make sure all lights work properly.
Appliance Circuits
Appliance circuits handle devices like microwaves, refrigerators, and air conditioners. These circuits usually require 120-volt or 240-volt systems. Always check the power requirements of each appliance. Use dedicated circuits for high-power devices. Connect the appliance to the distribution panel with the right gauge wire. Verify connections are secure. This reduces the risk of electrical problems. Test each appliance after wiring. Confirm it operates as expected.

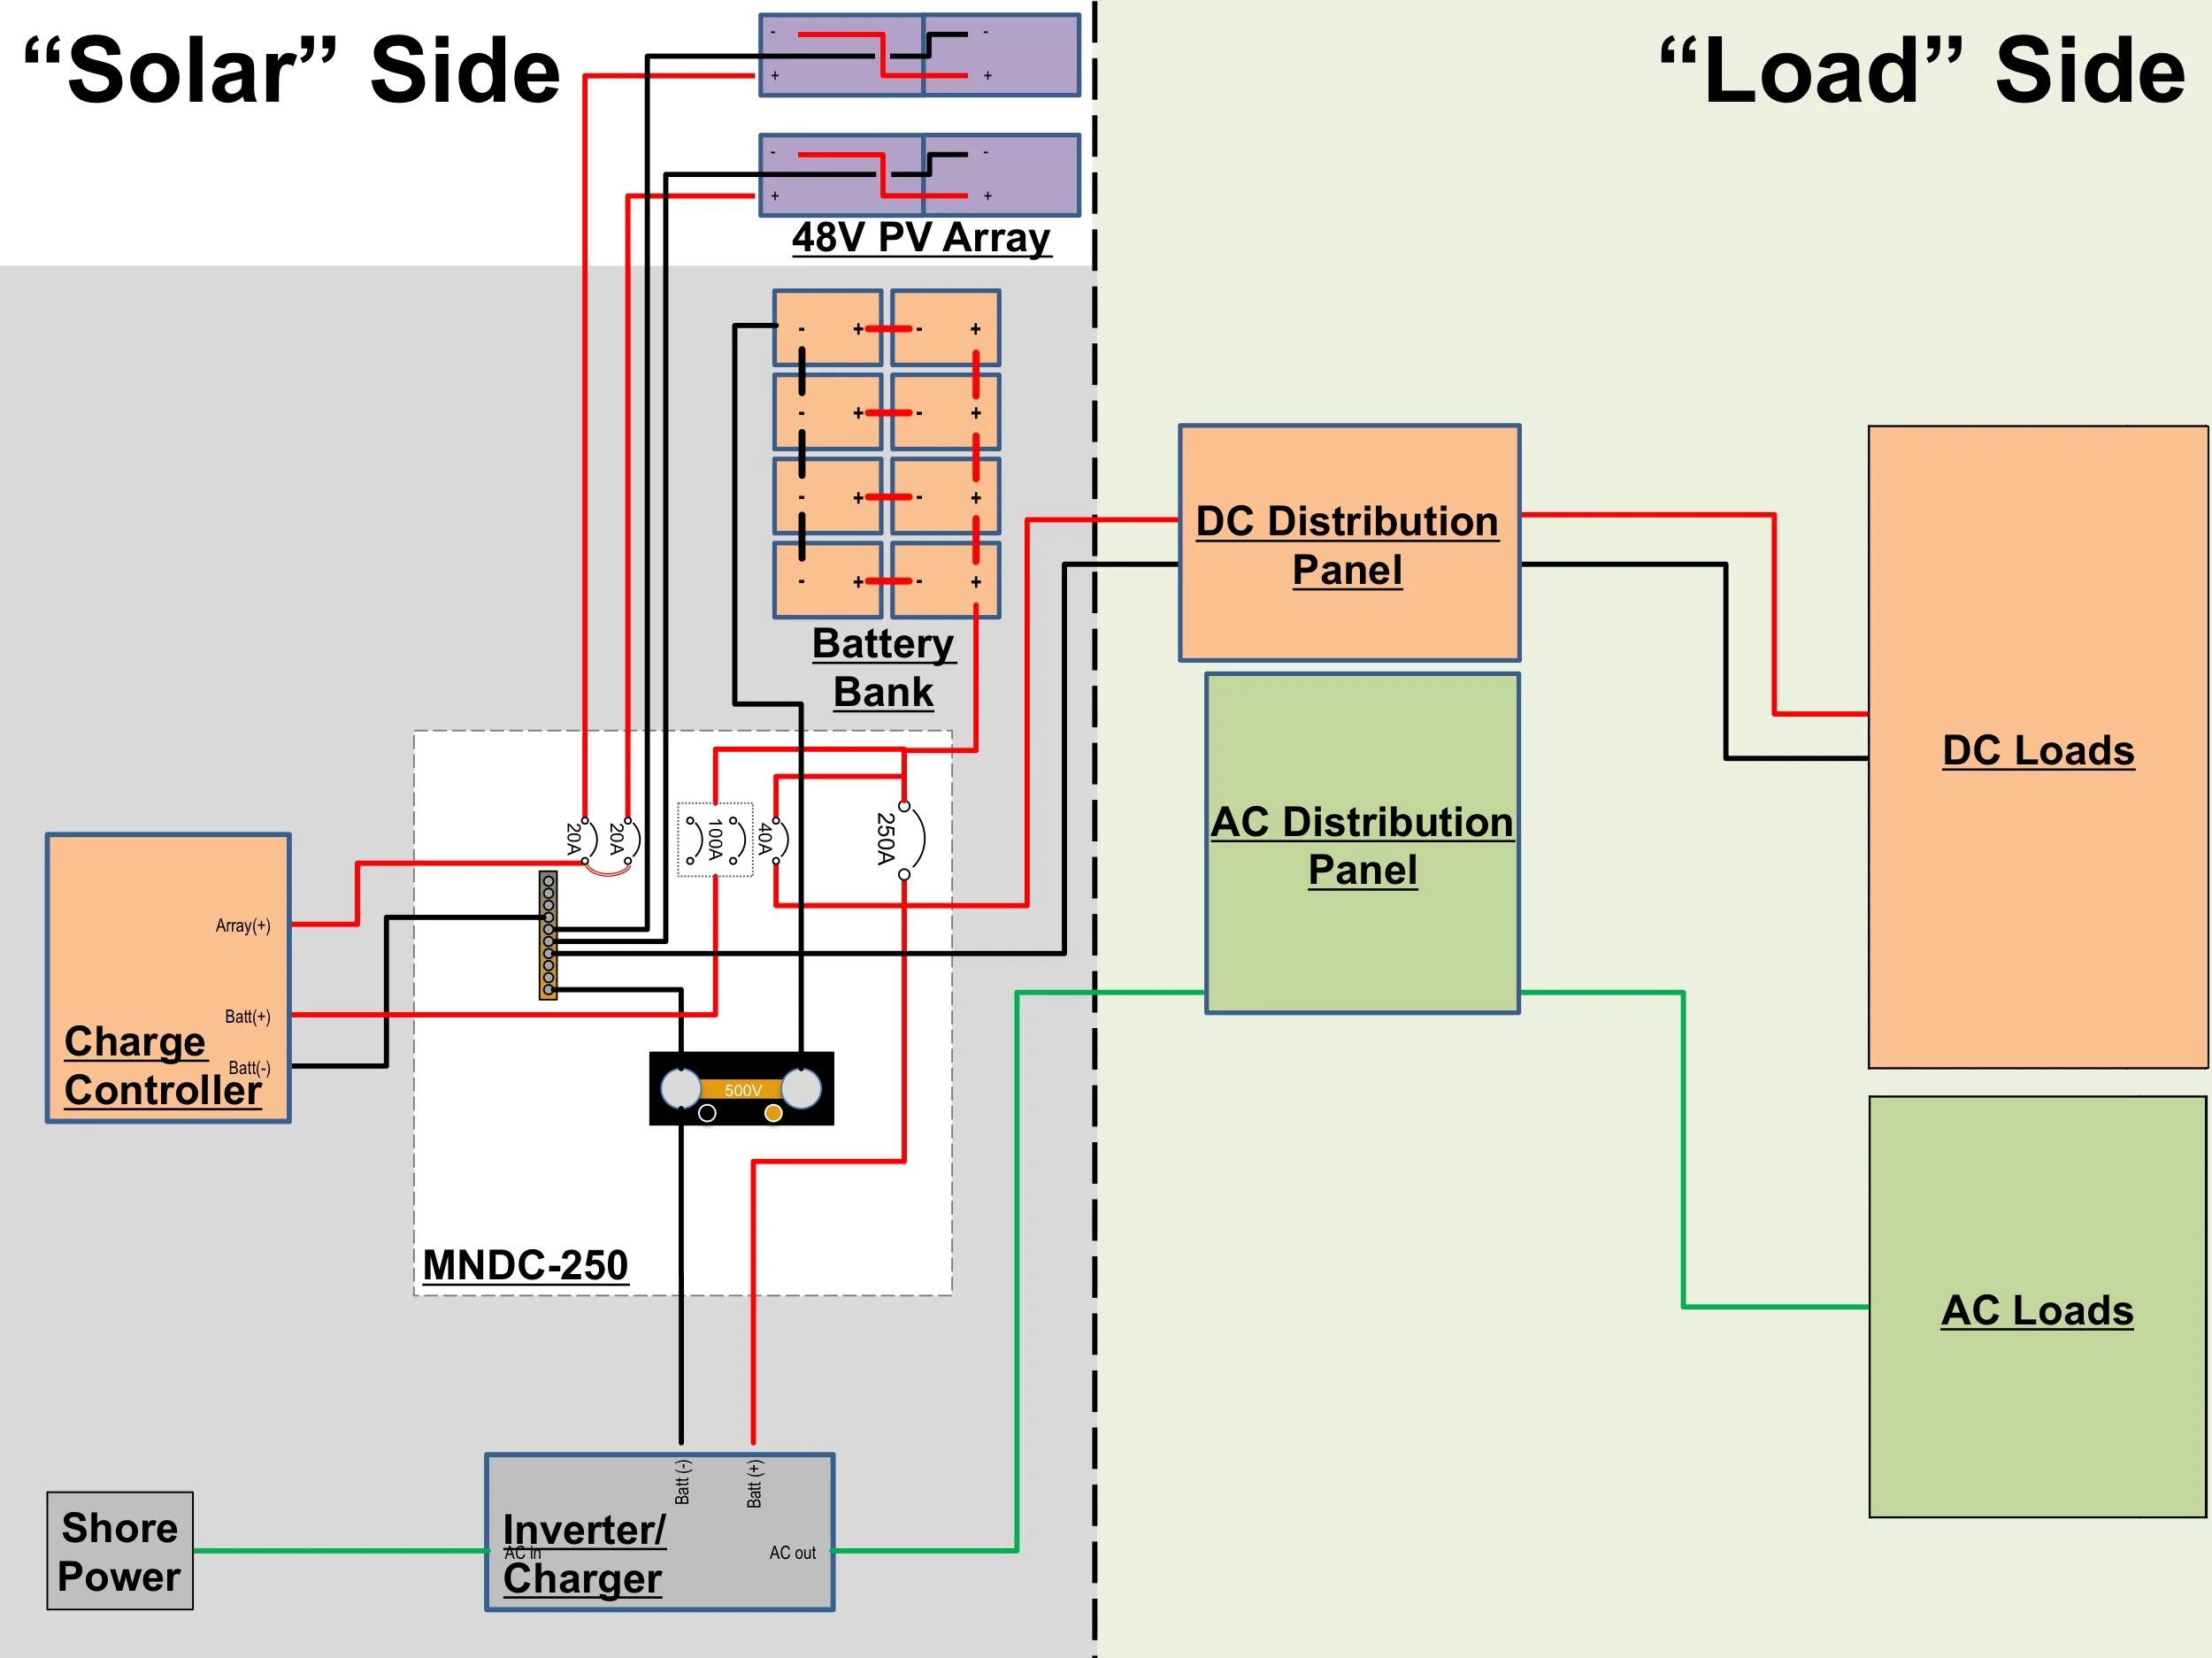
Credit: www.pinterest.com
Safety Tips And Precautions
Working on an RV distribution panel wiring diagram requires attention to detail. Safety is the most important factor. Simple mistakes can lead to serious issues. In this section, we will cover essential safety tips and precautions to follow.
Avoiding Common Mistakes
When dealing with RV wiring, some mistakes are common. Here are a few tips to avoid them:
- Double-check your connections: Ensure all wires are properly connected. Loose wires can cause short circuits.
- Use the right tools: Always use tools designed for electrical work. This reduces the risk of accidents.
- Follow the wiring diagram: Stick to the diagram to avoid confusion. This ensures the correct connections.
Ensuring Safe Connections
Safe connections are crucial in RV wiring. Here are some pointers to ensure safe connections:
- Turn off the power: Always switch off the main power before working on the panel. This prevents electric shocks.
- Use insulated tools: Insulated tools offer protection against electrical currents. They are a safety must-have.
- Check wire insulation: Inspect wires for any damage or wear. Replace damaged wires to ensure safety.
By following these tips, you can safely work on your RV distribution panel. Remember, safety first!
Troubleshooting Common Issues
Troubleshooting common issues with your RV distribution panel can be daunting. Knowing how to identify and fix problems is essential. This guide will help you through the process. We will cover identifying electrical problems and fixing wiring errors.
Identifying Electrical Problems
First, check for any visible signs of damage. This includes burnt wires or melted insulation. Look for loose connections. These can cause intermittent power issues. Use a multimeter to check voltage levels. Ensure they match the expected values.
Identify the affected circuits. Turn off all appliances and lights. Turn them on one by one. This will help you find which circuit has the issue. Check the fuses and breakers. Replace any blown fuses and reset tripped breakers.
Fixing Wiring Errors
Wiring errors can cause many problems. Inspect the distribution panel for incorrect connections. Ensure all wires are connected to the right terminals. If wires are loose, tighten them.
Replace any damaged wires. Use the correct gauge wire for each circuit. Incorrect wire size can cause overheating. Double-check the wiring diagram. Ensure all connections match the diagram. This will help you spot any errors.
Use wire nuts to secure connections. This prevents wires from coming loose. Label each wire. This makes future troubleshooting easier. Proper labeling helps you identify circuits quickly.
Maintenance And Inspections
Regular maintenance and inspections of your RV distribution panel wiring diagram are crucial. These steps ensure your electrical system remains safe and reliable. Proper care can prevent many potential issues. It also extends the lifespan of your RV’s electrical components.
Understanding the importance of maintenance can save you time and money. Let’s explore some key aspects of maintaining and inspecting your RV distribution panel wiring diagram.
Regular Inspection Checklist
Regular inspections are vital for your RV’s electrical health. Here is a simple checklist to follow:
- Check for any loose or frayed wires.
- Inspect the panel for signs of corrosion or rust.
- Ensure all connections are tight and secure.
- Test all circuit breakers for proper functioning.
- Look for any burnt or discolored wires.
Perform these checks every few months. Regular inspections help you catch issues early. This proactive approach can prevent bigger problems down the road.
Upgrading Your Electrical System
Sometimes, an upgrade is necessary to keep your RV running smoothly. Upgrading your electrical system can improve efficiency and safety. Here are some tips for upgrading:
- Consider installing a surge protector to safeguard your appliances.
- Upgrade to higher quality circuit breakers for better performance.
- Replace old or outdated wiring with modern, safer options.
- Consult with a professional electrician for complex upgrades.
Upgrading your electrical system can seem daunting. But it is often worth the investment. A well-maintained and upgraded system ensures a safe and enjoyable RV experience.
Frequently Asked Questions
What Is An Rv Distribution Panel?
An RV distribution panel is the central hub for electrical circuits in your RV. It distributes power from the main source to various electrical devices.
How Do I Wire An Rv Distribution Panel?
Wiring an RV distribution panel involves connecting the main power source to the panel. Then, you distribute power to individual circuits. Always follow safety guidelines.
What Safety Precautions Should I Take?
Always turn off the power source before working on the panel. Use insulated tools and wear protective gear. Double-check all connections.
Can I Install An Rv Distribution Panel Myself?
Yes, you can install it yourself if you have basic electrical knowledge. Always follow the manufacturer’s instructions and safety guidelines.
Conclusion
Understanding RV distribution panel wiring diagrams is crucial for safety. It helps in maintaining the electrical system. Always follow guidelines to avoid any mishaps. Proper wiring ensures smooth operations. Remember to check connections regularly. Simple steps can prevent major issues.
Keep your RV in top shape. Enjoy worry-free travels. Stay informed and stay safe.


