
Adding Freon to your RV air conditioner can seem like a daunting task. But with the right guidance, it becomes straightforward and manageable.
When you’re on the road in your RV, a cool interior is crucial for comfort. Over time, your RV’s air conditioner may lose its cooling power due to low Freon levels. Topping up the Freon can restore its efficiency, making your travels more pleasant.
In this guide, we will walk you through the steps of adding Freon to your RV air conditioner. This way, you can ensure a cool and comfortable journey wherever you go. Let’s get started!

Credit: www.youtube.com
Signs Your Rv Ac Needs Freon
Maintaining a comfortable temperature in your RV is crucial. But sometimes, your RV air conditioner might not work as expected. This could be a sign that it needs Freon. Recognizing these signs early can save you time and discomfort.
Inefficient Cooling
If your RV’s AC is blowing warm air, it might need Freon. Freon is essential for cooling the air. Without enough Freon, the AC cannot cool the air properly. You may notice that your RV stays warm even when the AC is on. This can be frustrating during hot days. Check the temperature setting. If it’s set correctly but the air is still warm, Freon might be low.
Unusual Noises
Pay attention to any strange sounds from your RV’s AC. A well-functioning AC should run quietly. If you hear hissing or bubbling noises, it could mean a Freon leak. These sounds are not normal and should be checked. Leaks can reduce the Freon level, affecting the cooling efficiency. Addressing these noises early can prevent bigger issues.
Safety Precautions
Adding Freon to your RV air conditioner can improve its performance. Safety is paramount in this process. Freon can be hazardous if not handled properly. Here, we will discuss essential safety precautions.
Handling Freon Safely
When working with Freon, ensure you are in a well-ventilated area. Freon is a chemical that can be harmful if inhaled. Avoid closed spaces to reduce exposure.
Use tools designed for handling Freon. These include gauges, hoses, and canisters specifically for refrigerants. Improper tools can lead to leaks or spills.
Keep Freon away from open flames or high heat. Freon is flammable and can ignite under certain conditions. Always check for leaks before starting your RV air conditioner.
Protective Gear
Always wear protective gear when handling Freon. Gloves, goggles, and long-sleeved clothing are essential. These items protect your skin and eyes from contact.
Use a face mask to avoid inhaling Freon. Even brief exposure can cause respiratory issues. Ensure your mask fits well and covers your nose and mouth completely.
Keep a fire extinguisher nearby. In case of an emergency, you should be prepared. A quick response can prevent accidents from escalating.
Tools Required
Adding Freon to your RV air conditioner can seem challenging. But with the right tools, the process becomes straightforward. Having the proper equipment ensures the task gets done efficiently. Below, we will discuss the essential tools required for this task.
Freon Kit
A Freon kit is essential. It usually includes a can of Freon and a connector hose. The hose helps in transferring the Freon to the air conditioner. Always check that the kit is compatible with your RV’s AC unit. Ensure it’s specifically designed for RVs. This prevents any possible damage.
Pressure Gauge
A pressure gauge is crucial. It measures the Freon levels inside the air conditioner. This tool ensures you add the correct amount of Freon. Overfilling can damage the AC unit. Underfilling might not cool the air properly. Attach the gauge to the low-pressure side of the air conditioner. Monitor the readings carefully as you add the Freon.
Preparing Your Rv
Before adding Freon to your RV air conditioner, it’s essential to prepare your RV. Proper preparation ensures safety and efficiency. Follow these steps to get your RV ready.
Turning Off Power
First, turn off the power to your RV. This is a crucial safety step. Unplug your RV from any power source. You don’t want any electricity flowing while working.
Next, turn off the air conditioner. Ensure all switches are off. This will prevent any accidental starting of the unit.
Locating The Ac Unit
Find the AC unit on your RV. It’s usually on the roof. Use a ladder to reach it safely. Make sure you have a stable base to stand on.
Once you’re on the roof, locate the AC cover. This cover protects the unit. You’ll need to remove it to access the AC components.
Use a screwdriver to take off the cover. Be careful not to lose any screws. Place them in a safe spot for later reassembly.
Adding Freon
Maintaining your RV air conditioner is crucial. Adding Freon can ensure it runs smoothly. Freon helps in cooling the air inside your RV. Over time, Freon levels can drop. This can lead to poor cooling. Follow these steps to add Freon to your RV air conditioner.
Connecting The Gauge
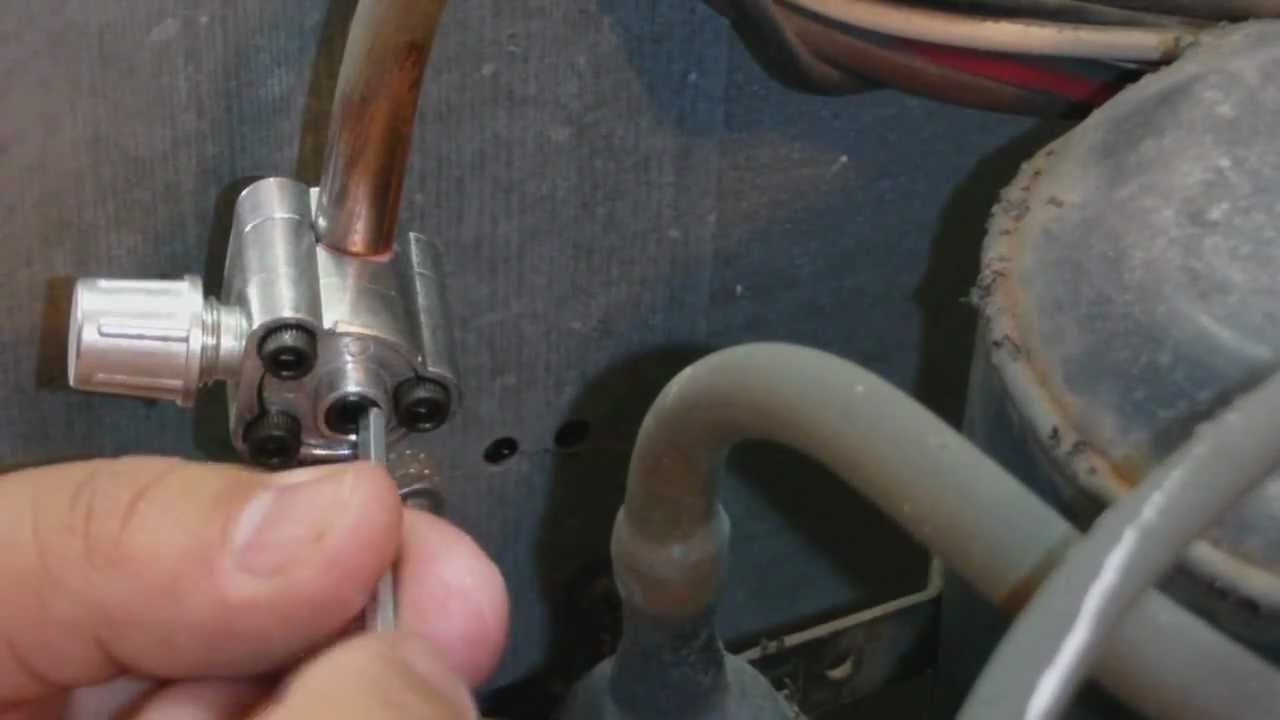
First, gather the necessary tools. You will need a gauge set, Freon, and protective gloves. Safety is important. Always wear gloves when handling Freon. Locate the air conditioner’s service port. It is usually near the compressor.
Connect the gauge set to the service port. Ensure the connections are tight. Loose connections can cause Freon to leak. Check the gauge readings. They will show the current Freon levels. This helps you know how much Freon to add.
Releasing Freon
Open the valve on the Freon canister. Slowly release the Freon into the system. Monitor the gauge readings closely. Adding too much Freon can damage the air conditioner.
Close the valve once the desired level is reached. Disconnect the gauge set carefully. Ensure no Freon is leaking. Finally, test the air conditioner. It should cool the air effectively. If not, repeat the process.

Credit: frosty-freezeacproducts.com
Testing The Ac
Testing the AC is a critical step after adding Freon to your RV air conditioner. This ensures that the system is functioning correctly and efficiently. Let’s break down the process into simple steps under each heading.
Checking Cool Air Output
First, turn on your RV’s air conditioner. Set it to the coldest setting. Place a thermometer in the air vent. Wait for a few minutes. Check the temperature on the thermometer. The air should be at least 20 degrees Fahrenheit cooler than the room temperature.
If the air is not cool enough, there might be other issues. Low Freon might not be the only problem. Check for other potential issues with the AC unit.
Monitoring Pressure Levels
Next, connect a pressure gauge to the low-pressure port of the AC system. Start the air conditioner. The pressure should be between 40 and 50 psi. If the reading is too low, you might need more Freon. If it’s too high, there might be a blockage in the system.
Refer to your RV’s manual for specific pressure levels. Different models might have slightly different requirements.
Below is a basic table showing ideal pressure levels:
| Condition | Pressure (psi) |
|---|---|
| Optimal | 40-50 |
| Low | Below 40 |
| High | Above 50 |
Always make sure to follow the safety guidelines. Wear protective gear. Keep the area well-ventilated.
Maintenance Tips
Maintaining your RV air conditioner is essential for optimal performance. Regular care can extend the lifespan of your AC unit and ensure you stay cool during your travels. Here are some practical maintenance tips for adding Freon to your RV air conditioner.
Regular Inspections
Regular inspections are crucial for spotting issues early. Check for any leaks or damage. Look at the unit’s connections and ensure everything is secure. Inspect the Freon level periodically. Low Freon can reduce the cooling efficiency.
Cleaning The Ac Unit
Cleaning the AC unit helps maintain its efficiency. Remove dust and debris from the unit’s exterior. Clean the filters regularly to ensure proper airflow. Dirty filters can cause the unit to work harder. This can lead to higher energy consumption.
Ensure the condenser coils are clean. Dirty coils can affect the unit’s cooling ability. Use a soft brush or a vacuum to clean them. Avoid using water or harsh chemicals. Keeping your AC unit clean can improve its performance.
Frequently Asked Questions
How Do You Add Freon To An Rv Air Conditioner?
To add Freon, locate the service port, attach a refrigerant gauge, and add the recommended amount of Freon. Ensure the system is off before starting.
What Type Of Freon Does An Rv Ac Use?
Most RV air conditioners use R-22 or R-410A Freon. Check your RV manual to confirm the correct type.
Can I Add Freon To My Rv Ac Myself?
Yes, you can add Freon yourself if you follow safety precautions. However, it’s recommended to have a professional do it for optimal safety.
Why Is My Rv Ac Not Cooling?
Your RV AC might not cool due to low Freon levels. Other reasons include dirty filters, blocked vents, or a malfunctioning compressor.
Conclusion
Adding Freon to your RV air conditioner is essential for cool travels. Regular maintenance ensures the system works efficiently. Check for leaks before adding Freon. Wear protective gear for safety. Follow the steps carefully to avoid damage. If unsure, seek professional help.
Remember, a well-functioning air conditioner enhances your RV experience. Enjoy your cool, comfortable journeys!


