
Running wires through an RV ceiling can seem challenging. But with the right approach, it’s manageable.
Having a well-organized and functional RV setup is essential for any road trip. Whether you’re installing new lights, adding solar panels, or upgrading your entertainment system, running wires through your RV ceiling is a necessary task. This process might sound daunting, but with some basic tools and a clear plan, you can do it efficiently.
By following practical steps, you can ensure your wiring is safe and hidden, making your RV both functional and neat. Ready to tackle this project? Let’s explore how to run wires through your RV ceiling effectively.
Tools And Materials Needed
Running wires through your RV ceiling can be a daunting task. But with the right tools and materials, the job becomes much easier. This guide will help you gather everything you need to get started.
Essential Tools
Before you start, make sure you have the following tools:
- Drill and Drill Bits: A cordless drill is ideal. Ensure you have various bit sizes.
- Fish Tape: Helps in guiding wires through tight spaces.
- Wire Strippers: Essential for stripping the insulation off your wires.
- Voltage Tester: Ensures safety by checking if wires are live.
- Utility Knife: Useful for cutting through insulation and wires.
- Screwdrivers: Both flathead and Phillips are necessary.
- Measuring Tape: Helps in planning the wire routes accurately.
Required Materials
Gather these materials before starting the wiring process:
- Electrical Wires: Choose the right gauge for your needs.
- Wire Connectors: For joining wires securely.
- Electrical Tape: Important for insulating connections.
- Conduit: Protects wires from damage and keeps them organized.
- Mounting Brackets: Holds the conduit in place.
- Insulation: Helps in maintaining temperature and protecting wires.
- Zip Ties: Useful for bundling wires together.
Safety Precautions
Ensure the power is off before starting. Wear safety goggles to protect your eyes. Use a stud finder to avoid drilling into electrical wires.
Running wires through an RV ceiling requires careful planning and attention. Safety should always be your top priority to avoid accidents and damage. Here are some important safety precautions to consider.
Protective Gear
Wearing the right protective gear is crucial. Always wear safety goggles to protect your eyes from debris. Use gloves to shield your hands from sharp edges and electrical components. Long sleeves can also prevent cuts and scratches.
Electrical Safety
Turn off the power before starting any work. This reduces the risk of electrical shock. Use a voltage tester to ensure no live wires are present. Double-check your work area for any hidden wires or electrical components. Tape any exposed wire ends to prevent accidental contact. Always follow these safety measures to protect yourself and your RV. Being cautious can make the process smoother and safer. “`
Planning The Wire Route
Planning the wire route is crucial when running wires through your RV ceiling. Proper planning ensures a smooth installation process. It also helps avoid potential problems. Let’s delve into the steps you need to follow.
Mapping The Ceiling
Start by creating a map of your RV ceiling. This map will guide you in planning the wire route. Mark all the existing fixtures and outlets. Identify where you want the new wires to go. Having a clear map helps you visualize the route.
Measure the distance between points. This ensures you have enough wire. Use a tape measure for accurate measurements. Write down the measurements on your map. This will be useful later when you start the installation.
Avoiding Obstacles
Identify potential obstacles in your RV ceiling. These can include beams, vents, or insulation. Knowing these obstacles helps you plan a clear route. Avoid areas where the wire could get damaged.
Use a stud finder to locate beams and other hidden structures. This tool helps you avoid drilling into important parts of your RV. Mark these obstacles on your map. Plan your wire route around them for a hassle-free installation.
Preparing The Rv Ceiling
Running wires through an RV ceiling requires careful preparation. Ensuring the ceiling is ready will make the process smoother and less stressful. Let’s dive into the steps you need to take to prepare your RV ceiling.
Removing Panels
Start by removing the ceiling panels. This step gives you access to the space behind the ceiling. Use a screwdriver to unscrew the panels. Store the screws safely; you will need them later.
Gently pull the panels away from the ceiling. Be cautious to avoid damaging them. If panels are stuck, use a flat tool to pry them loose. Work slowly and patiently.
Locating Studs
Locating the studs in the ceiling is crucial. Studs provide support and are the best place to run wires. Use a stud finder to identify the location of the studs. Move the stud finder slowly across the ceiling. Mark the studs’ positions with a pencil.
Knowing where the studs are will help you plan your wiring route. It ensures the wires are secure and properly hidden behind the ceiling.
Drilling Holes
Running wires through your RV ceiling might seem tricky. But drilling holes can make the task easier. It allows you to create a clear path for your wires. This section will guide you on the right way to drill holes in your RV ceiling.
Selecting Drill Bits
Picking the right drill bit is important. Different materials need different bits. For your RV ceiling, use a bit for wood or metal. These bits are strong and can handle the ceiling’s material. Always check the size of the bit. It should match the size of your wire. This helps the wire fit snugly without extra space.
Proper Drilling Techniques
Start by marking where you want to drill. Use a pencil to make a small dot. This keeps your drill steady. Hold the drill firmly with both hands. Begin drilling at a slow speed. This gives you control and prevents damage. Increase the speed gradually as you drill deeper. Always keep the drill straight. Tilting can cause uneven holes. Once done, clean the area to remove any debris. This ensures a smooth path for your wires.

Credit: www.youtube.com
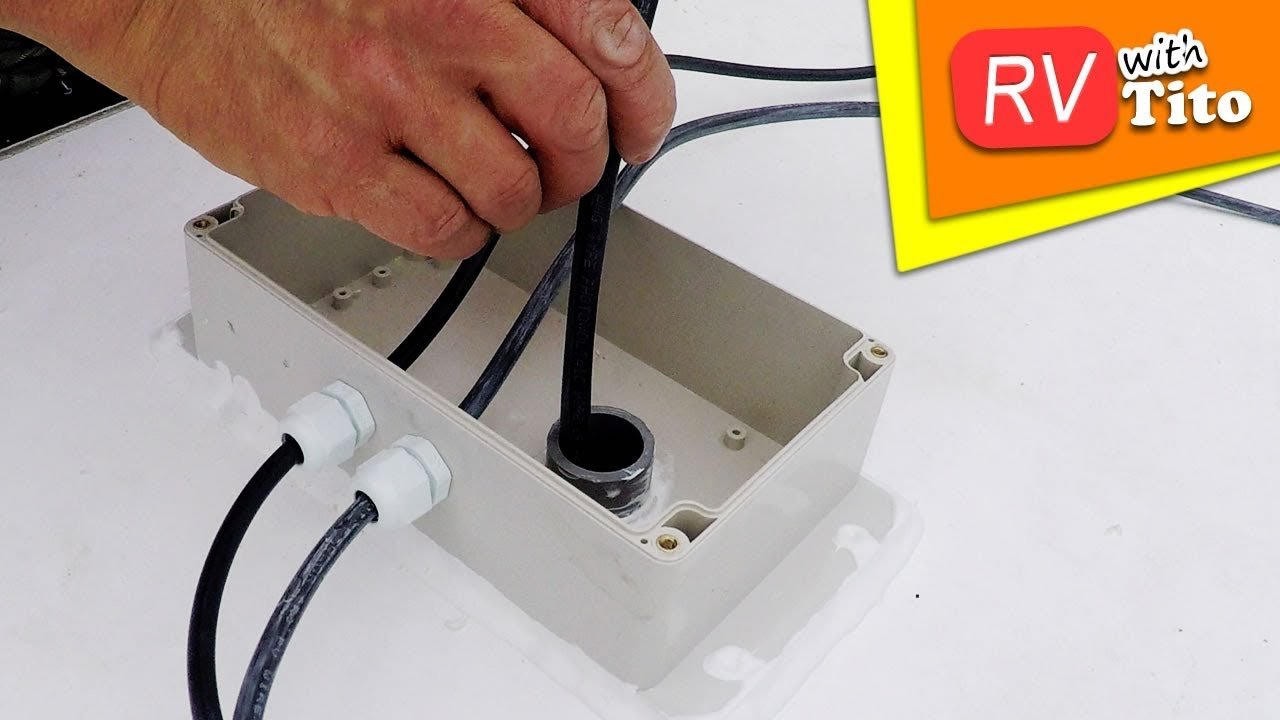
Fishing The Wires
Running wires through an RV ceiling can be a challenging task. One critical step is fishing the wires. This process involves guiding the wires through the ceiling space. It requires patience and the right tools.
Using A Fish Tape
A fish tape is an essential tool for this job. It is a long, flexible tool designed to pull wires through confined spaces. Start by feeding the fish tape through the ceiling. Push it gently to avoid getting stuck on obstacles. Once the fish tape reaches the desired location, attach the wires to it. Use electrical tape to secure the wires firmly. Pull the fish tape back through the ceiling, bringing the wires along with it.
Guiding The Wires
Guiding the wires correctly is crucial for a clean installation. After pulling the wires through, ensure they are not tangled. Use wire clips to keep them organized and secure. Avoid sharp bends that could damage the wires. Route the wires through existing channels if possible. This will protect them from wear and tear. Double-check the length to ensure there is enough slack for connections. This step ensures your wiring job is neat and efficient.
Connecting The Wires
Once you have run the wires through your RV ceiling, the next crucial step is connecting them properly. This ensures that all your electrical devices function safely and efficiently. Let’s break down the process into easy steps.
Stripping Insulation
Before you can connect the wires, you need to strip the insulation. Use a wire stripper tool for this task. Place the wire in the appropriate slot on the stripper tool. Gently squeeze the handles and pull away the insulation. This exposes the bare wire. Be careful not to cut into the wire itself.
Here’s a quick table to help you with wire sizes and their corresponding stripper slots:
| Wire Gauge | Stripper Slot |
|---|---|
| 10 AWG | 10 |
| 12 AWG | 12 |
| 14 AWG | 14 |
Securing Wire Connections
After stripping the insulation, secure the wire connections. Twist the exposed wire ends together tightly. Use wire nuts to cover the twisted ends. This ensures a solid connection and prevents short circuits. If you have to join multiple wires, consider using a terminal block for better organization.
Here’s a step-by-step process:
- Twist the wires together.
- Place a wire nut over the twisted ends.
- Turn the wire nut clockwise until snug.
- Give the wires a slight tug to ensure they are secure.
For an extra layer of safety, wrap the connection with electrical tape. This prevents the wire nut from coming loose over time.
Following these steps will help you safely connect the wires in your RV. This ensures all electrical systems work properly.
Testing The Installation
After running wires through your RV ceiling, testing the installation is crucial. This ensures everything works correctly. It also helps identify any issues early. Follow these steps for a smooth testing process.
Checking Connectivity
First, check the connectivity of all wires. Use a multimeter to test each connection. Ensure the wires are secure and not loose. Loose wires can cause intermittent problems. Confirm there is power running through the wires.
Next, test all connected devices. Turn on the lights, fans, or any other appliances. Observe if they are functioning properly. If a device does not work, recheck its wiring connection. Make sure all connections are tight and secure.
Troubleshooting Issues
Encountering issues is common. Start by identifying the problem. Check for any visible damage to the wires. Inspect each connection point carefully. Ensure no wires are pinched or cut.
If a device still does not work, use your multimeter. Check for continuity in the wires. Continuity means the wire is complete and not broken. A lack of continuity indicates a problem in the wire.
Sometimes, the issue may be with the connected device. Test the device with another power source. If it works, the problem is in the wiring. If it does not, the device may be faulty.
After identifying the issue, fix the problem and retest. Repeat the process until everything functions perfectly.
Finishing Touches
After running wires through your RV ceiling, it’s time for the final steps. Properly finishing your project will ensure a neat and professional look. This section will guide you through reinstalling panels and cleaning up.
Reinstalling Panels
Once the wires are in place, you need to put the ceiling panels back. Follow these steps:
- Align the panels with the original screw holes.
- Use a screwdriver to secure each panel firmly.
- Double-check that all panels are level and snug.
Ensure the wires are not pinched between the panels and the frame. This prevents damage and ensures safety.
Cleaning Up
Cleaning up is an essential part of any project. Here’s how you can do it efficiently:
- Collect all tools and materials used.
- Dispose of any debris or scraps properly.
- Wipe down the surfaces to remove dust and fingerprints.
Keeping your workspace clean helps maintain a safe and organized environment. It also gives your RV a polished look.

Credit: loneoakdesignco.com
Frequently Asked Questions
How Do You Fish Wires Through An Rv Ceiling?
To fish wires through an RV ceiling, use a fish tape or pull wire. Create a small hole, insert the fish tape, attach wires to the end, and carefully pull through.
What Tools Do I Need To Run Wires In An Rv?
You will need fish tape, wire strippers, electrical tape, and a drill. These tools help in creating holes and guiding wires.
Can You Run Wires Through Rv Ceiling Panels?
Yes, you can run wires through RV ceiling panels. Carefully remove panels, run wires, and reinstall them. Ensure proper insulation.
How Do You Avoid Damaging Rv Insulation When Wiring?
To avoid damaging RV insulation, use a fish tape to guide wires. Make small, precise holes and avoid excessive force.
Conclusion
Running wires through your RV ceiling can seem challenging. But it’s doable with some patience. Always prioritize safety. Use the right tools and materials. Plan your route carefully. Double-check connections to avoid issues. Seek professional help if unsure. With these tips, you can complete the task efficiently.
Now, your RV setup is ready for new adventures!


