
Replacing your RV bathroom countertop can seem daunting. But it doesn’t have to be.
An RV bathroom countertop replacement can refresh and modernize your space. Over time, countertops can wear out, get stained, or simply look outdated. Replacing them offers a chance to improve both the look and functionality of your RV bathroom. Whether you are a DIY enthusiast or hiring a professional, knowing the basics can make the process smoother.
This guide will help you understand what to expect, the materials available, and the steps involved. Dive in to learn how you can give your RV bathroom a fresh new look with a countertop replacement.

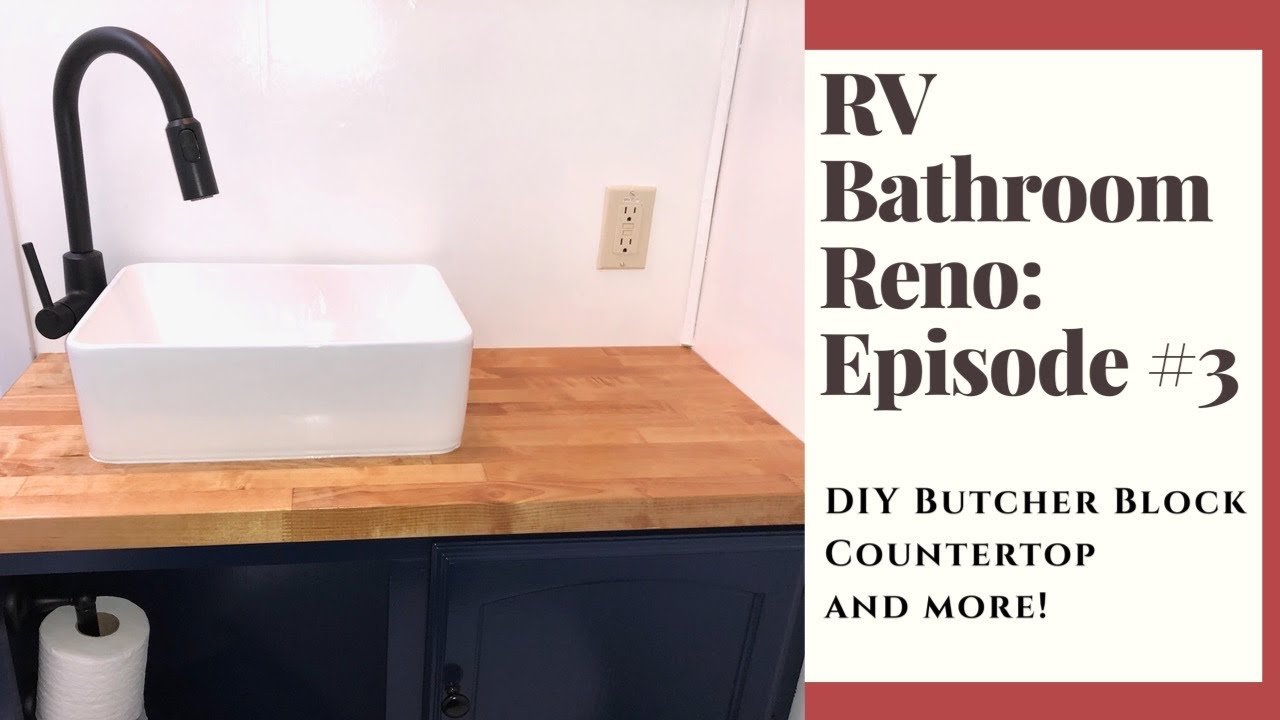
Credit: www.youtube.com
Choosing The Right Countertop Material
Choosing the right countertop material for your RV bathroom is crucial. The material affects durability, maintenance, and aesthetics. With many options available, making an informed decision ensures you get the best fit for your needs.
Popular Materials
Several materials are popular for RV bathroom countertops. Each has its own benefits and drawbacks. Here are some of the most common choices:
Laminate: A budget-friendly option that comes in various designs. Easy to install and clean.
Solid Surface: Offers a seamless look and is resistant to stains and moisture. Can be sanded if scratched.
Granite: A durable and luxurious choice. Heat and scratch-resistant but can be heavy.
Quartz: Non-porous, low maintenance, and available in many colors. Slightly heavier than other options.
Butcher Block: Provides a warm, natural look. Requires regular sealing to prevent water damage.
Pros And Cons
Each material has its advantages and disadvantages. Consider these points before making your decision:
Laminate:
Pros: Affordable, easy to clean, many design options.
Cons: Less durable, can chip or peel over time.
Solid Surface:
Pros: Seamless, repairable, stain-resistant.
Cons: Can be expensive, may scratch easily.
Granite:
Pros: Durable, heat-resistant, adds value.
Cons: Heavy, requires sealing, costly.
Quartz:
Pros: Non-porous, low maintenance, durable.
Cons: Expensive, heavy.
Butcher Block:
Pros: Warm, natural appearance, easy to cut to size.
Cons: Needs regular maintenance, prone to water damage.
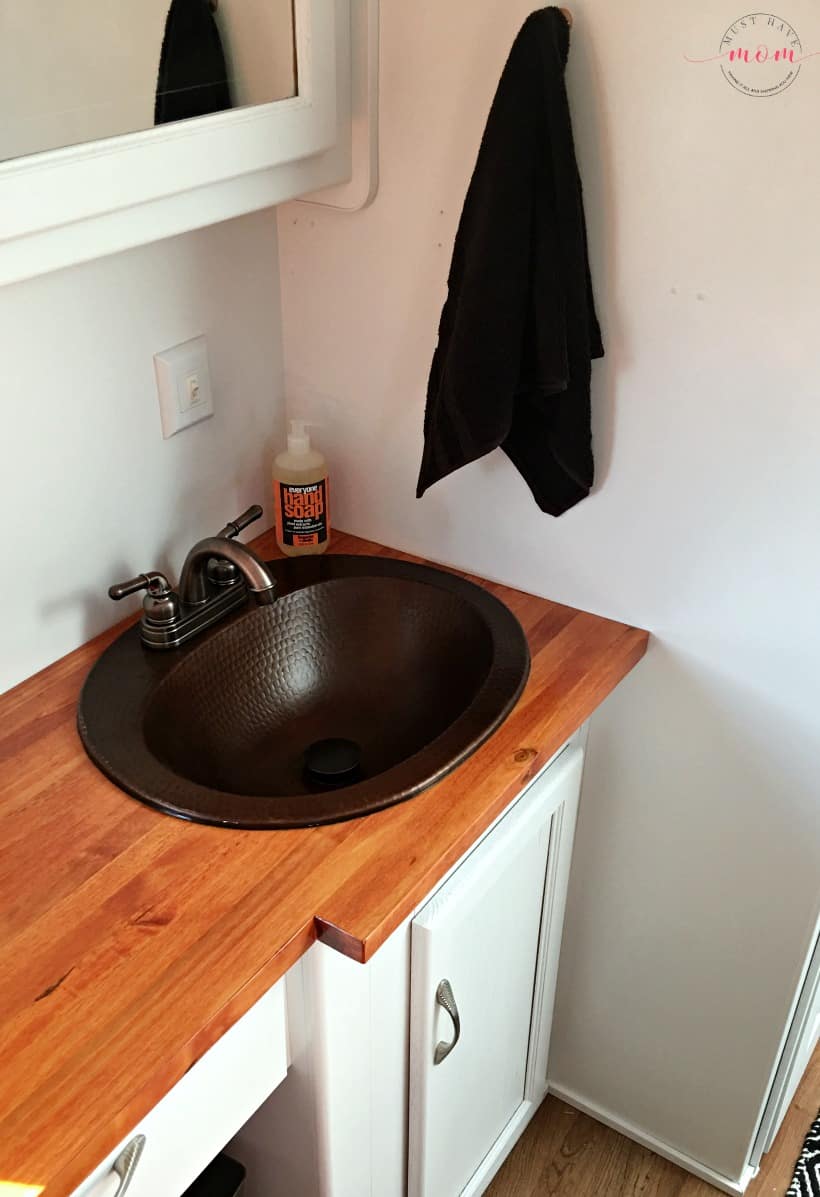
Credit: musthavemom.com
Measuring Your Rv Bathroom
Replacing the countertop in your RV bathroom can give it a fresh look. To ensure a perfect fit, measuring your RV bathroom correctly is essential. This section will guide you through the process, making it easy and straightforward.
Tools Needed
- Measuring tape
- Pencil and paper
- Level
- Masking tape
Step-by-step Guide
Follow these steps to measure your RV bathroom for a new countertop:
- Clear the area: Remove all items from the countertop. This includes any decor, toiletries, or appliances.
- Mark the edges: Use masking tape to mark the edges of the existing countertop. This helps in getting accurate measurements.
- Measure the length: Use the measuring tape to measure from one end to the other. Write down the measurement.
- Measure the width: Measure from the back wall to the front edge. Write down this measurement as well.
- Measure the depth: If your countertop has a backsplash, measure the height from the base to the top of the backsplash.
- Check for level: Use the level to check if your current countertop is flat. This ensures your new countertop will fit properly.
- Note any obstacles: Identify any sinks, faucets, or outlets that might interfere with the new countertop. Measure their positions and mark them on your drawing.
Creating a detailed drawing with all measurements can help. This ensures you get the right size countertop for your RV bathroom.
Removing The Old Countertop
Replacing your RV bathroom countertop can refresh your space and add value. The first step is to remove the old countertop. This process involves careful planning and execution. Let’s dive into the details of this task.
Safety Precautions
Before starting, ensure you have the right tools and safety gear. Wear gloves to protect your hands from sharp edges. Safety goggles are also essential to protect your eyes from dust and debris.
Turn off the water supply to the bathroom. This prevents any accidental leaks or water damage. Disconnect any electrical fixtures attached to the countertop.
Disassembly Process
Begin by removing any items stored on the countertop. Clear the area to make the workspace safe and efficient.
Next, locate the screws or bolts holding the countertop in place. These are usually found underneath the countertop or inside the cabinets. Use a screwdriver to remove them carefully.
Once all screws or bolts are removed, gently lift the countertop. You may need a helper to assist, especially if the countertop is large or heavy. Be cautious not to damage the surrounding walls or fixtures.
After removing the countertop, inspect the area for any remaining adhesive or sealant. Use a scraper to clean the surface thoroughly. This ensures a smooth installation of the new countertop.
Follow these steps to successfully remove the old RV bathroom countertop. Taking these precautions and steps will make the process safe and efficient.
Preparing The Surface
Replacing the countertop in your RV bathroom is an exciting project. To ensure a smooth installation, preparing the surface is crucial. This step ensures the new countertop adheres well and lasts longer. Let’s dive into some key preparation tasks.
Cleaning Tips
Start by removing any items on the countertop. Use a mild detergent mixed with warm water to clean the surface. Scrub gently with a sponge or soft cloth to avoid scratches. After cleaning, rinse with clean water and dry with a towel.
For stubborn stains, mix baking soda with water to form a paste. Apply the paste on the stains and let it sit for 10 minutes. Scrub gently and rinse off.
Repairing Damages
Inspect the surface for any cracks or holes. These need to be repaired before installing the new countertop. Use a putty knife to fill small cracks with wood filler or epoxy. Allow the filler to dry completely, then sand it smooth with fine-grit sandpaper.
For larger damages, you might need a patch. Cut a piece of matching material and secure it with adhesive. Once dry, sand the edges to make it level with the rest of the surface.
Installing The New Countertop
Replacing your RV bathroom countertop can refresh the entire space. Installing the new countertop requires careful steps. Let’s break down the process into easy parts.
Fitting And Cutting
First, measure the space where the new countertop will go. Measure twice to ensure accuracy. Use these measurements to cut the new countertop. A jigsaw works well for this task. Remember to cut slowly and steadily. This prevents any mistakes. If the countertop fits perfectly, great! If not, trim small pieces until it does.
Securing In Place
Once the countertop fits, it’s time to secure it. Apply a bead of silicone adhesive along the edges. Carefully place the countertop on top. Press down firmly to ensure it sticks. Use clamps to hold it in place. Let the adhesive dry completely. This can take several hours.
After the adhesive dries, check the stability. If it feels loose, add more adhesive. Finally, seal any gaps with silicone caulk. This prevents water damage. Your new RV bathroom countertop is now ready for use!

Credit: gypsyrangers.wordpress.com
Finishing Touches
Replacing the RV bathroom countertop is a significant upgrade. Yet, the final touches create a polished, complete look. These small details make a big difference. They ensure your new countertop looks and functions perfectly.
Sealing Edges
Sealing the edges prevents water damage and ensures durability. Use a high-quality silicone sealant. Apply it along the edges where the countertop meets the wall and sink. This creates a watertight seal.
To apply, cut the tip of the sealant tube at a 45-degree angle. Place the tube in a caulk gun. Apply a thin, continuous bead of sealant along the edge. Smooth it with a damp finger or a caulk smoothing tool.
Let the sealant dry according to the manufacturer’s instructions. This step is crucial. It prevents moisture from seeping into the countertop.
Adding Accessories
Accessories add both style and function to your RV bathroom. Consider adding a soap dispenser or toothbrush holder. These items keep the countertop organized.
Here are some ideas for accessories:
- Wall-mounted soap dispenser: Saves space on the countertop.
- Toothbrush holder: Keeps toothbrushes organized and clean.
- Decorative tray: Holds small items like jewelry or hair ties.
Choose accessories that match your RV’s decor. Stainless steel or plastic items are durable and easy to clean.
Installing a towel rack near the countertop is also useful. It keeps hand towels within reach. Consider a rack with hooks for added storage.
Each accessory enhances the functionality of your RV bathroom. They make everyday tasks easier and more efficient.
Maintaining Your New Countertop
Maintaining your new RV bathroom countertop is crucial for its longevity and appearance. Proper care ensures it stays beautiful and functional. Let’s explore the best ways to keep it in top shape.
Cleaning Routine
Establish a daily cleaning routine. Wipe the countertop with a soft cloth. Use mild soap and warm water to remove dirt. Avoid abrasive cleaners which can scratch the surface. Dry the countertop after cleaning to prevent water spots.
Preventive Measures
Prevent damage by using trivets for hot items. Avoid placing heavy objects directly on the countertop. Use cutting boards to prevent scratches. Be mindful of harsh chemicals; they can stain or dull the surface. Regularly inspect for any signs of damage or wear.
Cost Considerations
Replacing an RV bathroom countertop can seem daunting. The cost is a significant factor. Understanding the expenses helps in planning and decision-making.
Budgeting Tips
Start with a budget. Outline what you can spend. Track expenses to avoid overspending.
- Material Costs: Different materials have different prices. Laminate is cheaper. Granite is expensive.
- Labor Costs: Professional help costs more. DIY projects save money.
- Additional Costs: Include tools, adhesives, and finishing touches.
Compare prices. Look for sales and discounts. Do not compromise on quality for lower prices.
Diy Vs. Professional
Decide between DIY and hiring a professional. Each has pros and cons.
| DIY | Professional |
|---|---|
| Cost-effective | Higher cost |
| Requires time | Quick completion |
| Personal touch | Expert finish |
DIY projects are cheaper. They require time and effort. Professional services cost more. They offer expertise and speed. Choose based on your budget and skills.
Frequently Asked Questions
How Do You Replace An Rv Bathroom Countertop?
Replacing an RV bathroom countertop involves measuring, selecting materials, and cutting to fit. Secure the new countertop with adhesive and screws.
What Materials Are Best For Rv Countertops?
Laminate, solid surface, and lightweight composite materials are ideal for RV countertops due to their durability and weight.
Can I Install An Rv Countertop Myself?
Yes, with basic tools and DIY skills, you can install an RV countertop yourself by following a step-by-step guide.
How Much Does Rv Countertop Replacement Cost?
The cost of replacing an RV countertop varies. It ranges from $100 to $500 depending on materials and installation.
Conclusion
Replacing your RV bathroom countertop can enhance both style and function. It’s a simple project that adds value to your RV. Choose a durable material and follow the steps carefully. Your RV will feel more like home. Enjoy your travels with a fresh, new look.
Happy camping!


