
Understanding your RV’s ignition switch wiring diagram is crucial for maintenance. It helps ensure your vehicle starts and runs smoothly.
In the world of RVs, the ignition switch wiring diagram plays a vital role. This diagram guides you through the connections needed for starting your RV. Whether you’re troubleshooting a problem or installing a new switch, knowing how the wires connect is essential.
You don’t need to be an expert electrician to follow these diagrams. With a bit of patience and attention to detail, you can learn the basics. This knowledge can save you time and money, and keep your RV in top shape. So, let’s explore the importance of the RV ignition switch wiring diagram and how it can make your life easier.
Introduction To Rv Ignition Switch
The RV ignition switch is a crucial part of any recreational vehicle. It helps start the engine and power other essential systems. Understanding its wiring diagram is vital. This knowledge ensures the proper functioning of your RV’s electrical system.
Purpose Of Ignition Switch
The ignition switch serves several purposes. First, it allows the engine to start. By turning the key, you engage the starter motor. This process ignites the engine.
Second, it powers the vehicle’s electrical systems. This includes lights, air conditioning, and the radio. The switch ensures these systems work only when the key is in the correct position.
Finally, it acts as a security measure. Only the correct key can start the engine. This helps prevent theft.
Common Issues
Ignition switches can face several common issues. Here are some you might encounter:
- Worn Out Contacts: Over time, the internal contacts wear out. This can prevent the switch from working properly.
- Broken Key: Sometimes, the key can break inside the switch. This can make it hard to turn the switch on or off.
- Electrical Problems: Loose or corroded wires can cause electrical issues. This can affect the switch’s performance.
If you face these issues, it’s essential to fix them quickly. Doing so ensures your RV remains functional and safe.
Necessary Tools And Materials
To successfully work on an RV ignition switch wiring diagram, you need specific tools and materials. These tools and materials ensure the job is done safely and correctly. Let’s dive into the necessary tools and materials for this task.
Required Tools
- Screwdrivers: Both flathead and Phillips screwdrivers for different screws.
- Wire Strippers: Essential for removing insulation from the wires.
- Multimeter: To test electrical connections and ensure proper voltage.
- Pliers: Helpful for gripping and bending wires.
- Crimping Tool: Used for creating secure wire connections.
- Heat Shrink Tubing: For insulating wire connections.
- Electrical Tape: To wrap and secure wire connections.
Essential Materials
| Material | Purpose |
|---|---|
| Ignition Switch | The main component being installed or replaced. |
| Wiring Harness | Connects the ignition switch to the RV’s electrical system. |
| Connectors | Used to join wires securely. |
| Fuses | Protects the electrical circuit from overload. |
| Zip Ties | Organizes and secures wiring. |
| Battery Terminal Cleaner | Ensures clean and secure battery connections. |
These tools and materials are essential for any RV ignition switch wiring project. Having them on hand ensures the job gets done efficiently and safely.
Safety Precautions
Understanding RV ignition switch wiring diagrams is crucial. But ensuring safety precautions is even more vital. These steps help prevent accidents and ensure a smooth wiring process.
Electrical Safety
Working with electrical systems requires caution. Always turn off the power supply before starting. Use a voltage tester to confirm no power is flowing. Electric shock can be fatal, so this step is crucial.
Keep your workspace dry. Water and electricity don’t mix. A wet environment can cause short circuits. It can also lead to electric shocks.
Use insulated tools. They prevent accidental conduction. Make sure your tools are in good condition.
Protective Gear
Wear the right protective gear. This includes rubber gloves to prevent electric shocks. Safety goggles protect your eyes from sparks.
Avoid loose clothing. It can get caught in the wiring. Wear tight-fitting clothes instead.
Wear rubber-soled shoes. They provide extra insulation against electric shocks. Always be prepared for unexpected situations.
| Protective Gear | Purpose |
|---|---|
| Rubber Gloves | Prevent electric shocks |
| Safety Goggles | Protect eyes from sparks |
| Rubber-Soled Shoes | Provide insulation |
Remember, safety first. Follow these precautions to ensure a secure and efficient wiring process.
Credit: dodgeforum.com
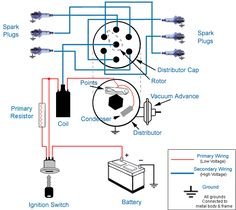
Understanding The Wiring Diagram
Understanding the wiring diagram of your RV’s ignition switch is crucial. It helps in troubleshooting problems and performing repairs. A clear wiring diagram can guide you through the connections, ensuring everything works perfectly. Let’s break it down into simple sections.
Diagram Symbols
Every wiring diagram includes symbols. These symbols represent different components. For example, a battery might be shown as two parallel lines. A switch could be a break in a line. Understanding these symbols is key to reading the diagram correctly. Most diagrams have a legend. This legend explains what each symbol means.
Color Codes
Color codes help identify wires. Each color represents a specific function. For example, red wires might connect to the battery. Black wires usually mean ground connections. Knowing these color codes can make wiring tasks easier. Always refer to the diagram’s legend. This will help avoid mistakes and ensure proper connections.
Step-by-step Wiring Guide
Welcome to our Step-by-Step Wiring Guide for your RV ignition switch. Wiring your RV ignition switch can seem daunting. But, with this guide, you’ll handle it easily. Follow these steps for a smooth process. Be sure to have your tools ready and stay safe throughout.
Disconnecting The Battery
Safety first. Always start by disconnecting the battery. This prevents any electrical accidents. Locate your RV’s battery. Use a wrench to disconnect the negative terminal first. This step is crucial to avoid any short circuits.
After disconnecting the negative terminal, proceed to the positive terminal. Ensure both terminals are fully disconnected before moving on. This will ensure your safety while working on the wiring.
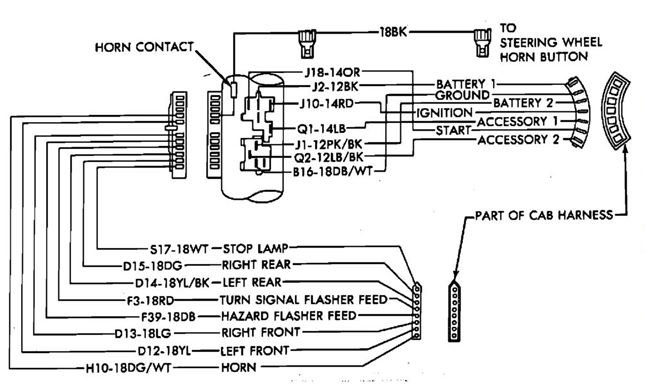
Locating The Ignition Switch
Next, you need to locate the ignition switch. In most RVs, the ignition switch is near the steering column. Sometimes it might be behind a panel. Use a screwdriver to remove any panels if needed.
Once located, examine the ignition switch. Identify the wires connected to it. Typically, there are four or five wires. Each wire has a specific function. Make note of their positions and colors. This will help you during the wiring process.
If unsure, refer to your RV’s manual. It should have a diagram. This will guide you in identifying the correct wires. Remember, accurate identification is key to proper wiring.
By following these steps, you will ensure a safe and efficient wiring process. Stay tuned for the next steps in wiring your RV ignition switch.
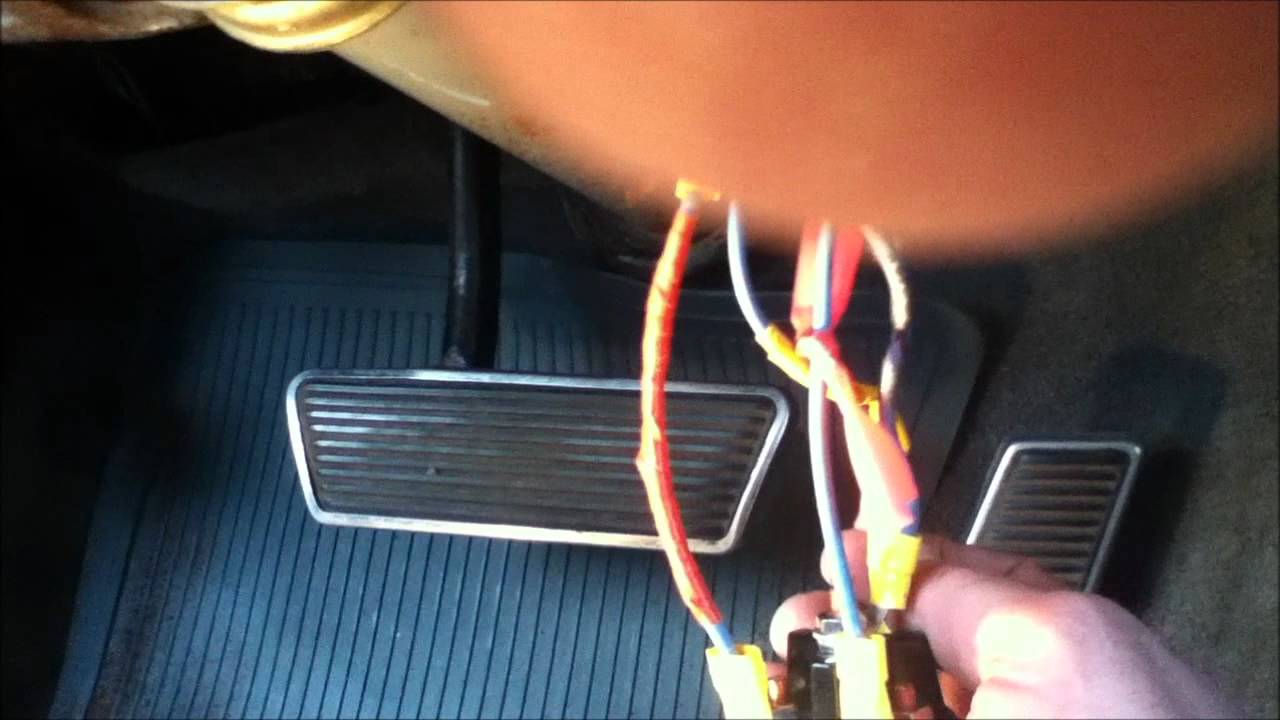
Connecting The Wires
Connecting the wires in an RV ignition switch can seem daunting. But with the right guidance, it becomes manageable. This section will guide you through the process step-by-step.
Identifying Wires
First, identify the wires connected to the ignition switch. Usually, you will find a battery wire, a starter wire, and accessory wires. These wires have different colors. Check the RV’s manual for the color code. This will help you match the wires correctly.
Proper Connections
After identifying the wires, it’s time to connect them. Begin with the battery wire. Attach it to the terminal marked “B” or “BAT”. Next, connect the starter wire to the terminal labeled “S” or “ST”. Finally, attach the accessory wires to the remaining terminals. These are often labeled “ACC” or “IGN”.
Ensure each connection is secure. Loose connections can cause problems. Use a wire connector or soldering to fix the wires firmly.
Testing The Ignition Switch
Testing the ignition switch in your RV is crucial. It ensures the electrical system functions properly. This process can help you identify issues early. You can avoid potential problems on the road.
Initial Testing
First, gather the necessary tools. You will need a multimeter and a screwdriver. Turn off the RV’s power supply. Locate the ignition switch. Remove the panel covering the switch. Inspect for visible damage.
Next, use the multimeter to check the switch’s continuity. Set the multimeter to the ohms setting. Touch the probes to the switch terminals. A reading of zero indicates a good switch. A high reading means the switch may be faulty.
Troubleshooting Issues
If the switch shows a high reading, further investigation is needed. Check the wiring connected to the switch. Look for loose or corroded connections. Tighten any loose wires. Clean corrosion with a wire brush.
Test the switch again after addressing wiring issues. If the problem persists, the switch might need replacement. Always use a compatible switch for your RV model. Consult your RV’s manual for guidance.
Sometimes the issue might not be the switch. Inspect the ignition system components. Ensure they are in good condition. Regular maintenance can prevent many ignition problems.
Credit: www.youtube.com
Maintaining The Ignition Switch
Maintaining the ignition switch in your RV is crucial for safety and reliability. Proper maintenance helps in ensuring smooth operation and extends the lifespan of the switch. Let’s explore some essential maintenance tasks for your RV’s ignition switch.
Regular Inspections
Conduct regular inspections of your ignition switch. Look for signs of wear and tear. Check for loose or frayed wires. Ensure all connections are secure. Inspect the ignition key for damage. Replace worn keys to avoid ignition problems.
Cleaning Tips
Clean the ignition switch regularly. Use a can of compressed air. Blow away any dirt or debris. Avoid using water or liquid cleaners. Moisture can damage the electrical components. A small brush can help remove stubborn dirt. Make sure the switch is dry before using it again.
Frequently Asked Questions
What Is An Rv Ignition Switch Wiring Diagram?
An RV ignition switch wiring diagram shows the connections and wiring layout. It helps in understanding and troubleshooting the ignition system.
How To Read An Rv Ignition Switch Wiring Diagram?
Start by identifying the symbols and color codes. Follow the wiring paths to understand connections.
Why Is An Rv Ignition Switch Wiring Diagram Important?
It helps in diagnosing electrical issues and ensures correct installation. It’s essential for safety and functionality.
Can I Install An Rv Ignition Switch Myself?
Yes, with a wiring diagram and basic tools, you can. Follow safety precautions and instructions carefully.
Conclusion
Understanding your RV ignition switch wiring diagram is crucial. It ensures safety. It also prevents potential issues down the road. Following the diagram helps you make accurate connections. This avoids electrical problems. So, always refer to the diagram when working on your RV.
Happy travels and safe journeys with your well-maintained RV!


